
I would like to show you how to use RTPCs to move game objects in Unity, and how to create audio-driven/audio-reactive objects. This article is for readers with knowledge of Wwise-101. I have made it easy to understand even if you've never written code in Unity before. If you aren't familiar with the basics of Wwise, refer to the Wwise-101 Certification Course, or check out my online courses. For those of you who are interested, I've provided links at the end of this blog.
How to Create Audio-Reactive Objects Using Wwise and Unity
The Goal
Setting Up the Projects
Creating the Unity Project
Integrating Wwise Into Unity
Setting Up Wwise
Generating Sound SFX, Events, and SoundBanks
Creating a Game Parameter and Assigning it to an RTPC
Preparing the Audio-Reactive Audio Bus and Setting an RTPC
Setting Up Unity
Custom AkBank Scripts
Script to Receive RTPCs and Modify Game Objects
Testing With the RTPC Parameter Cursor
Audio-Reactive Objects
Using Custom Scripts to Receive Audio Meter Plug-in Values
Changing the Material Color With the Sound
Conclusion
References
The Goal
I've always been interested in the audio visual concept, and how to control video with audio. There is a lot of information on how to control Wwise from Unity, but not so much the other way around. I looked into it and it was easier than I thought, so I would like to share it with you. I was inspired by the Audiokinetic blog, Lumote: Using Wwise to Drive In-Game Visual FX , but it didn't explain the steps in detail, so I will go into the specifics of how to create audio-reactive objects using the Meter plug-in.
My blog will show you how to to operate Unity game objects by moving the RTPC parameter cursor, like this:
YouTube: Wwise + Unity | Change the Scale of the Game Object with RTPC
and how to create audio-reactive objects, like this:
Youtube: Wwise + Unity | Audio Reactive
Setting Up the Projects
Before we begin, let's create the Unity and Wwise projects.
Creating the Unity Project
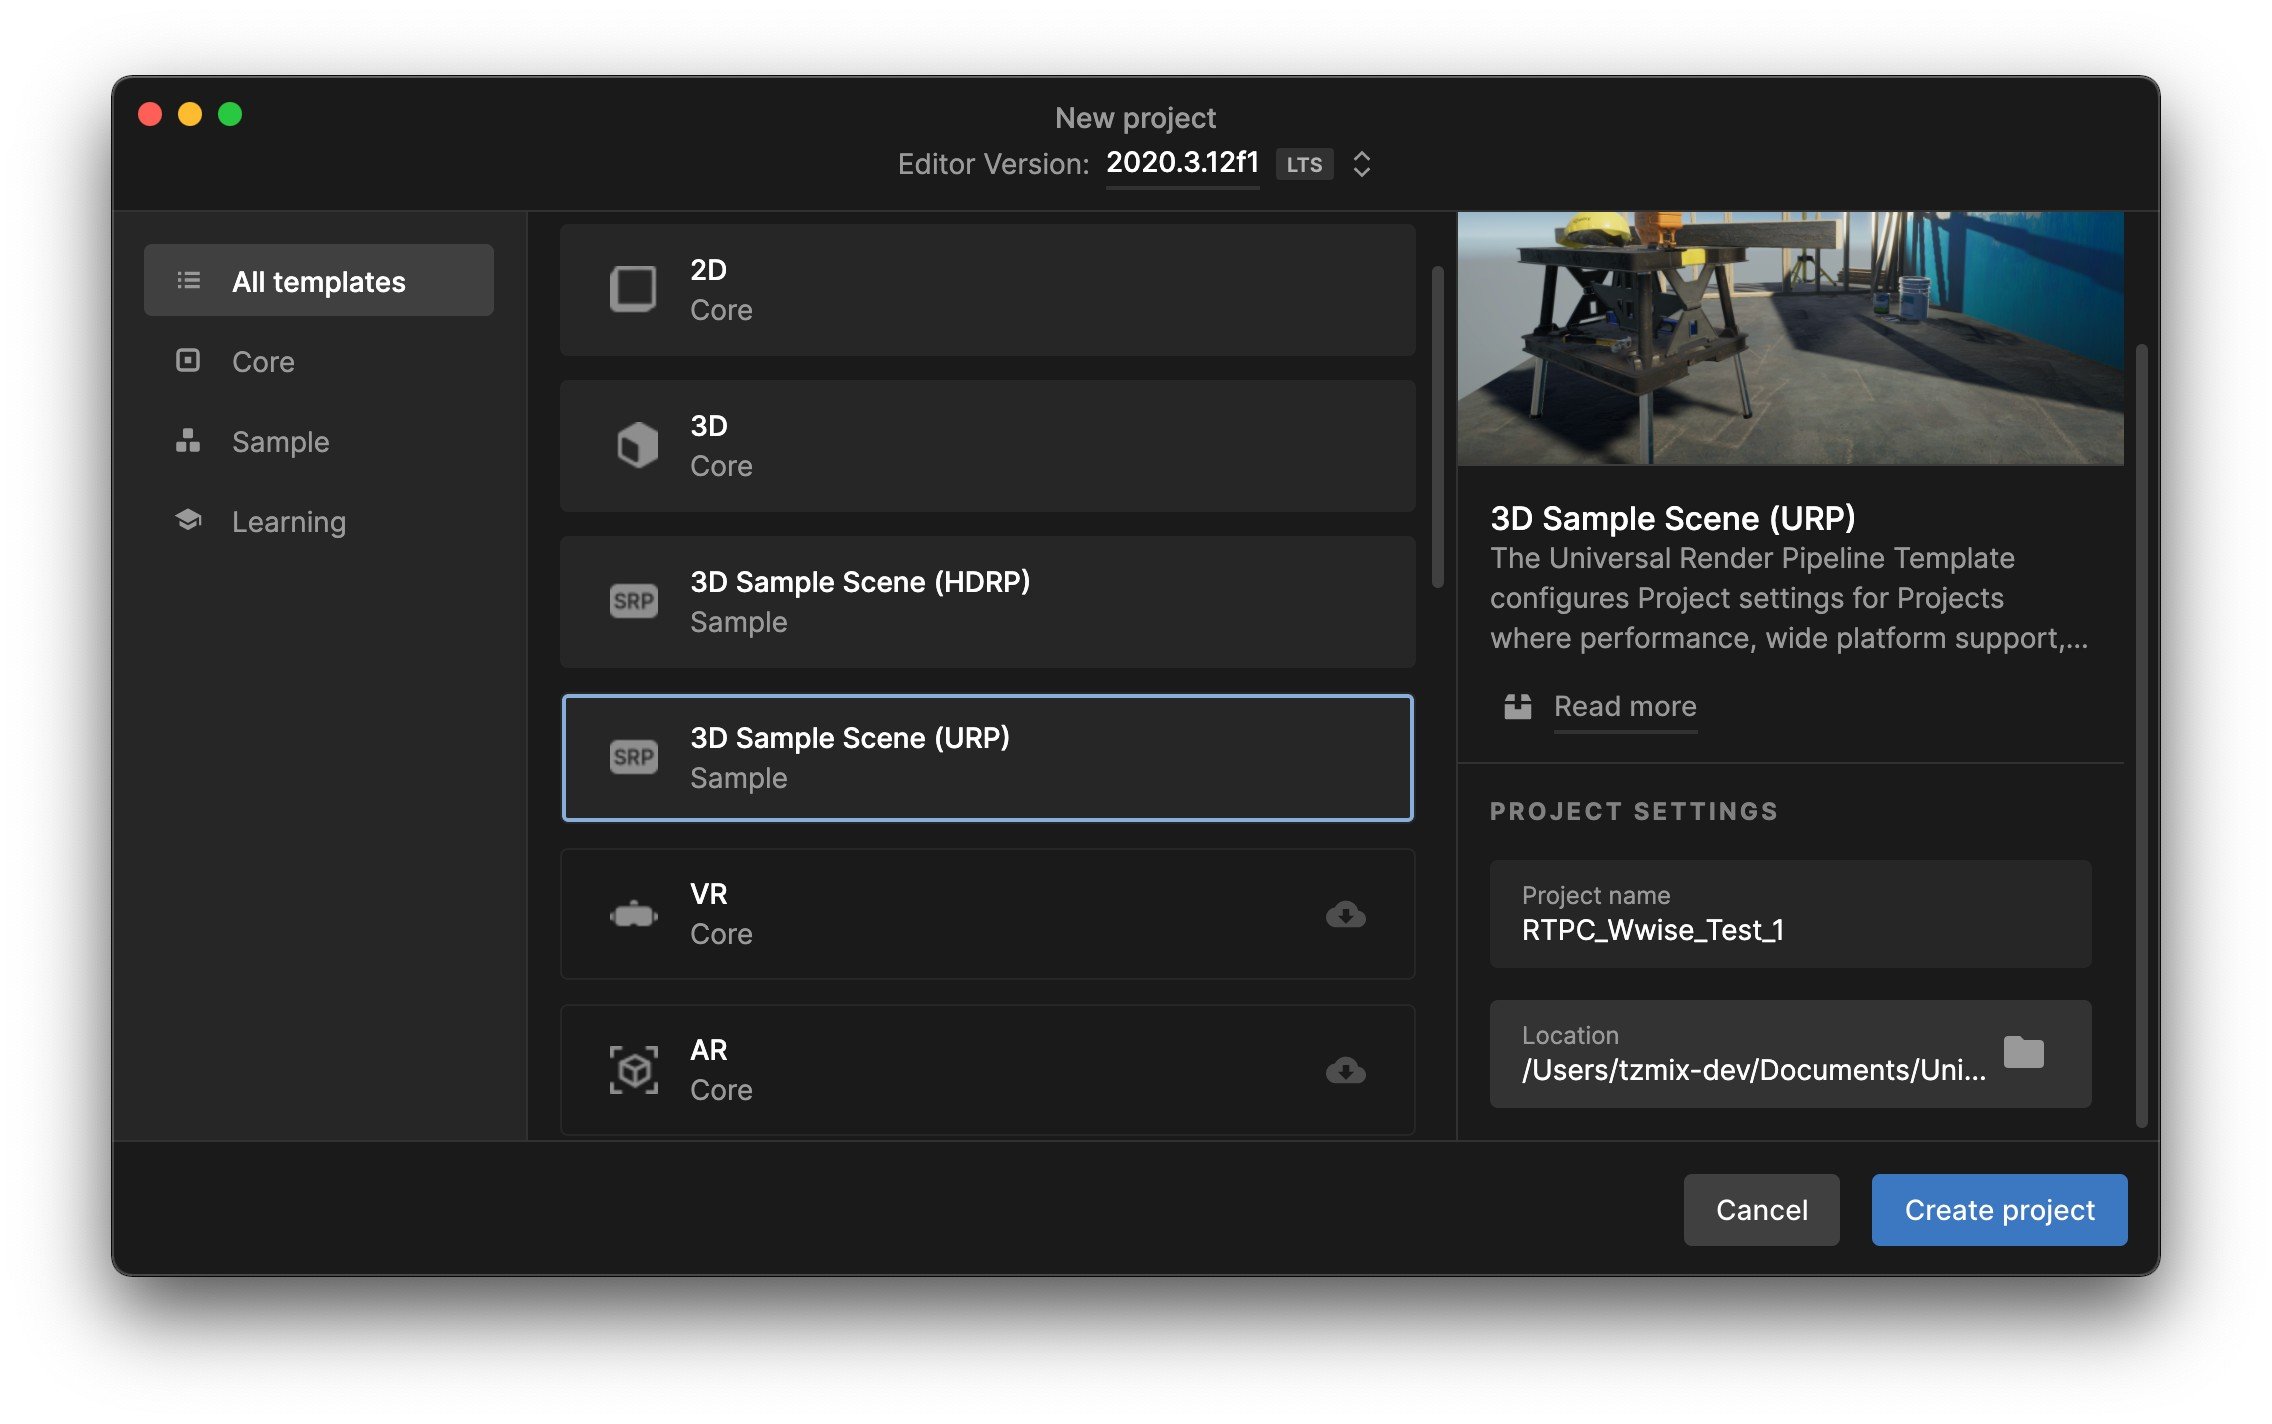
Launch the Unity Hub, and create a Unity project. Here, I am using Unity 2020.3.12f1 (LTS). Create the project using URP.
Integrating Wwise Into Unity
If you know how to integrate Wwise into Unity, you can skip this section and go to the Wwise setup. Here, I am using Wwise version 2021.1.8.7831.
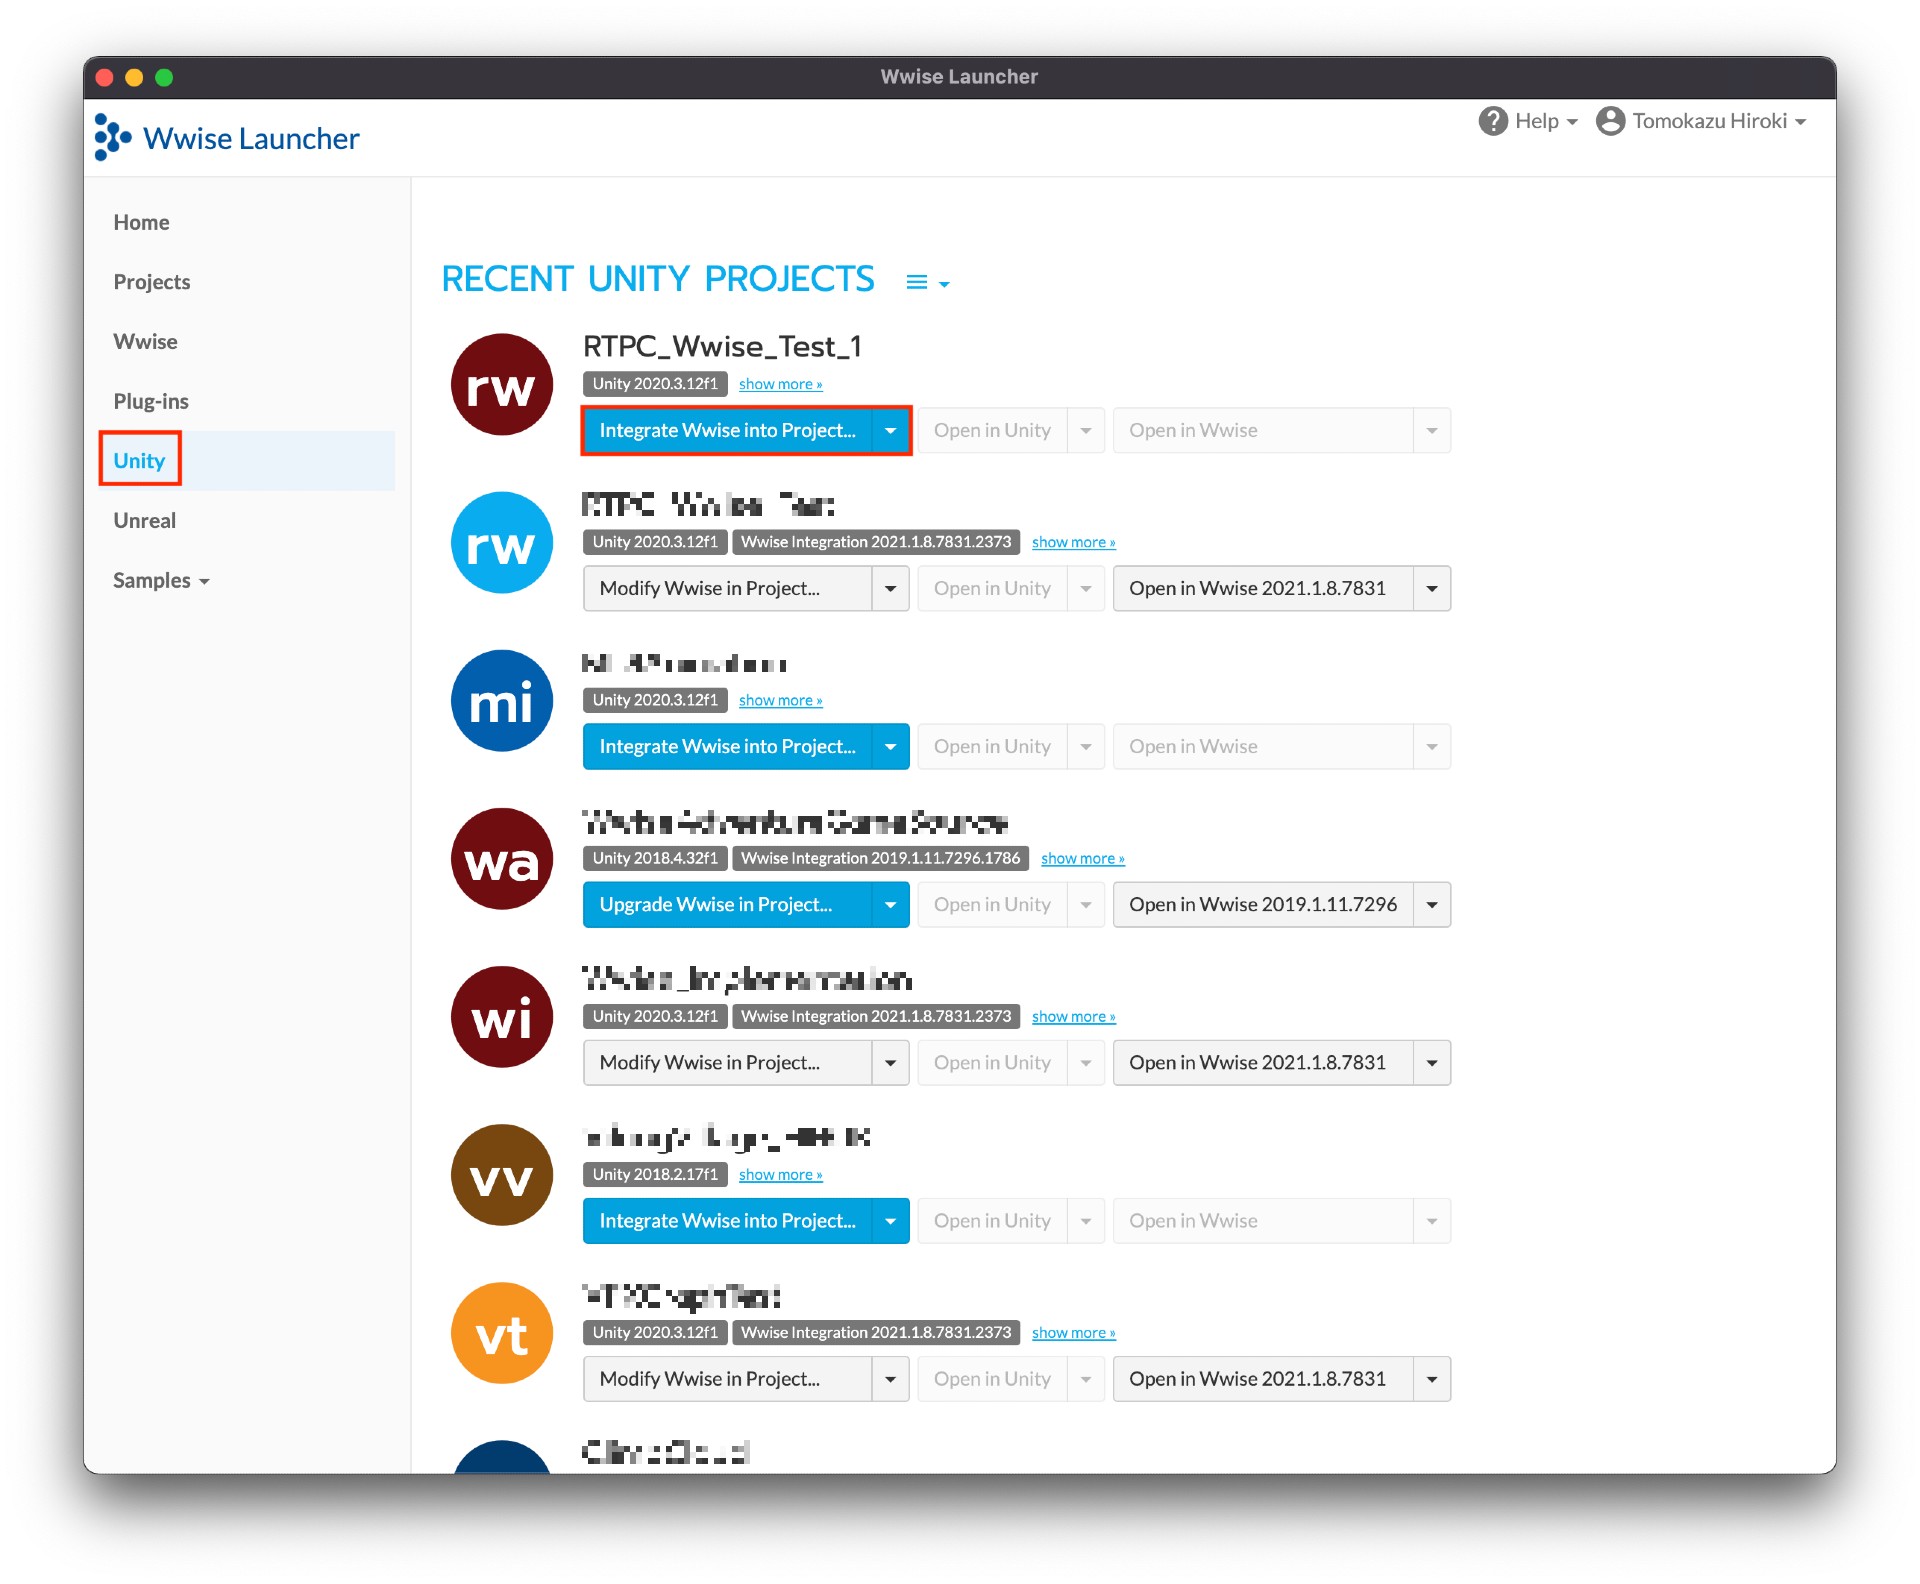
Close Unity (and the Unity Hub), and open the Audiokinetic Launcher.
Select the Unity tab, and click Integrate Wwise into Project...
You will see a screen similar to the one below. At the top, you can leave the selections for packages and deployment platforms as-is.
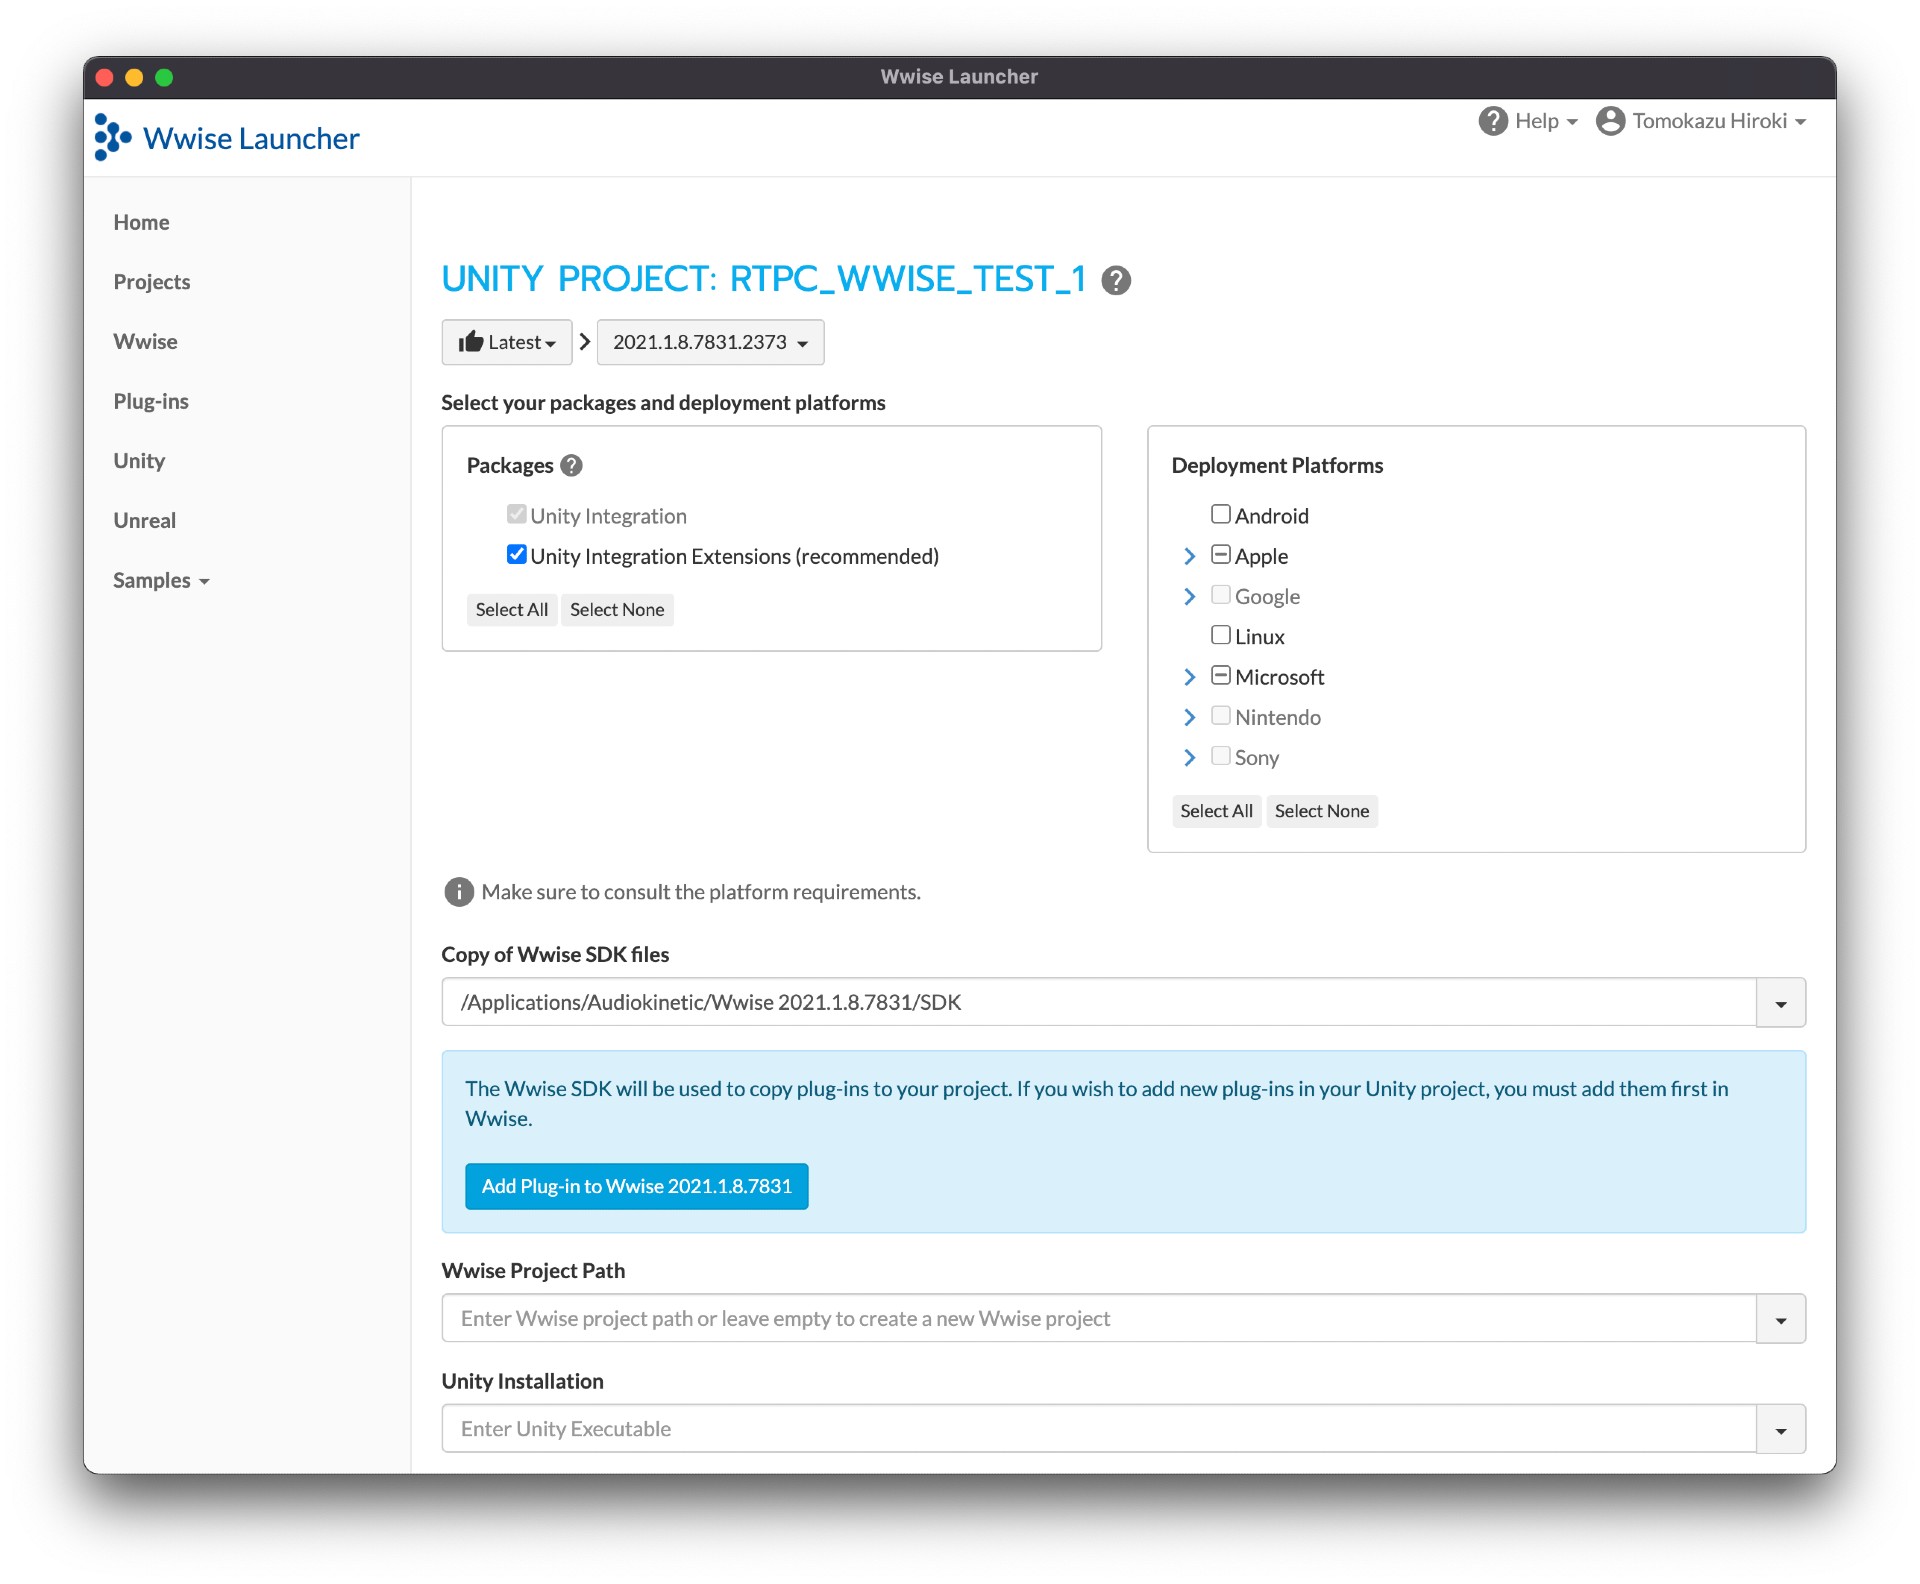
The Wwise Project Path should be left empty. In the Unity Installation section, select the Unity version you are using.
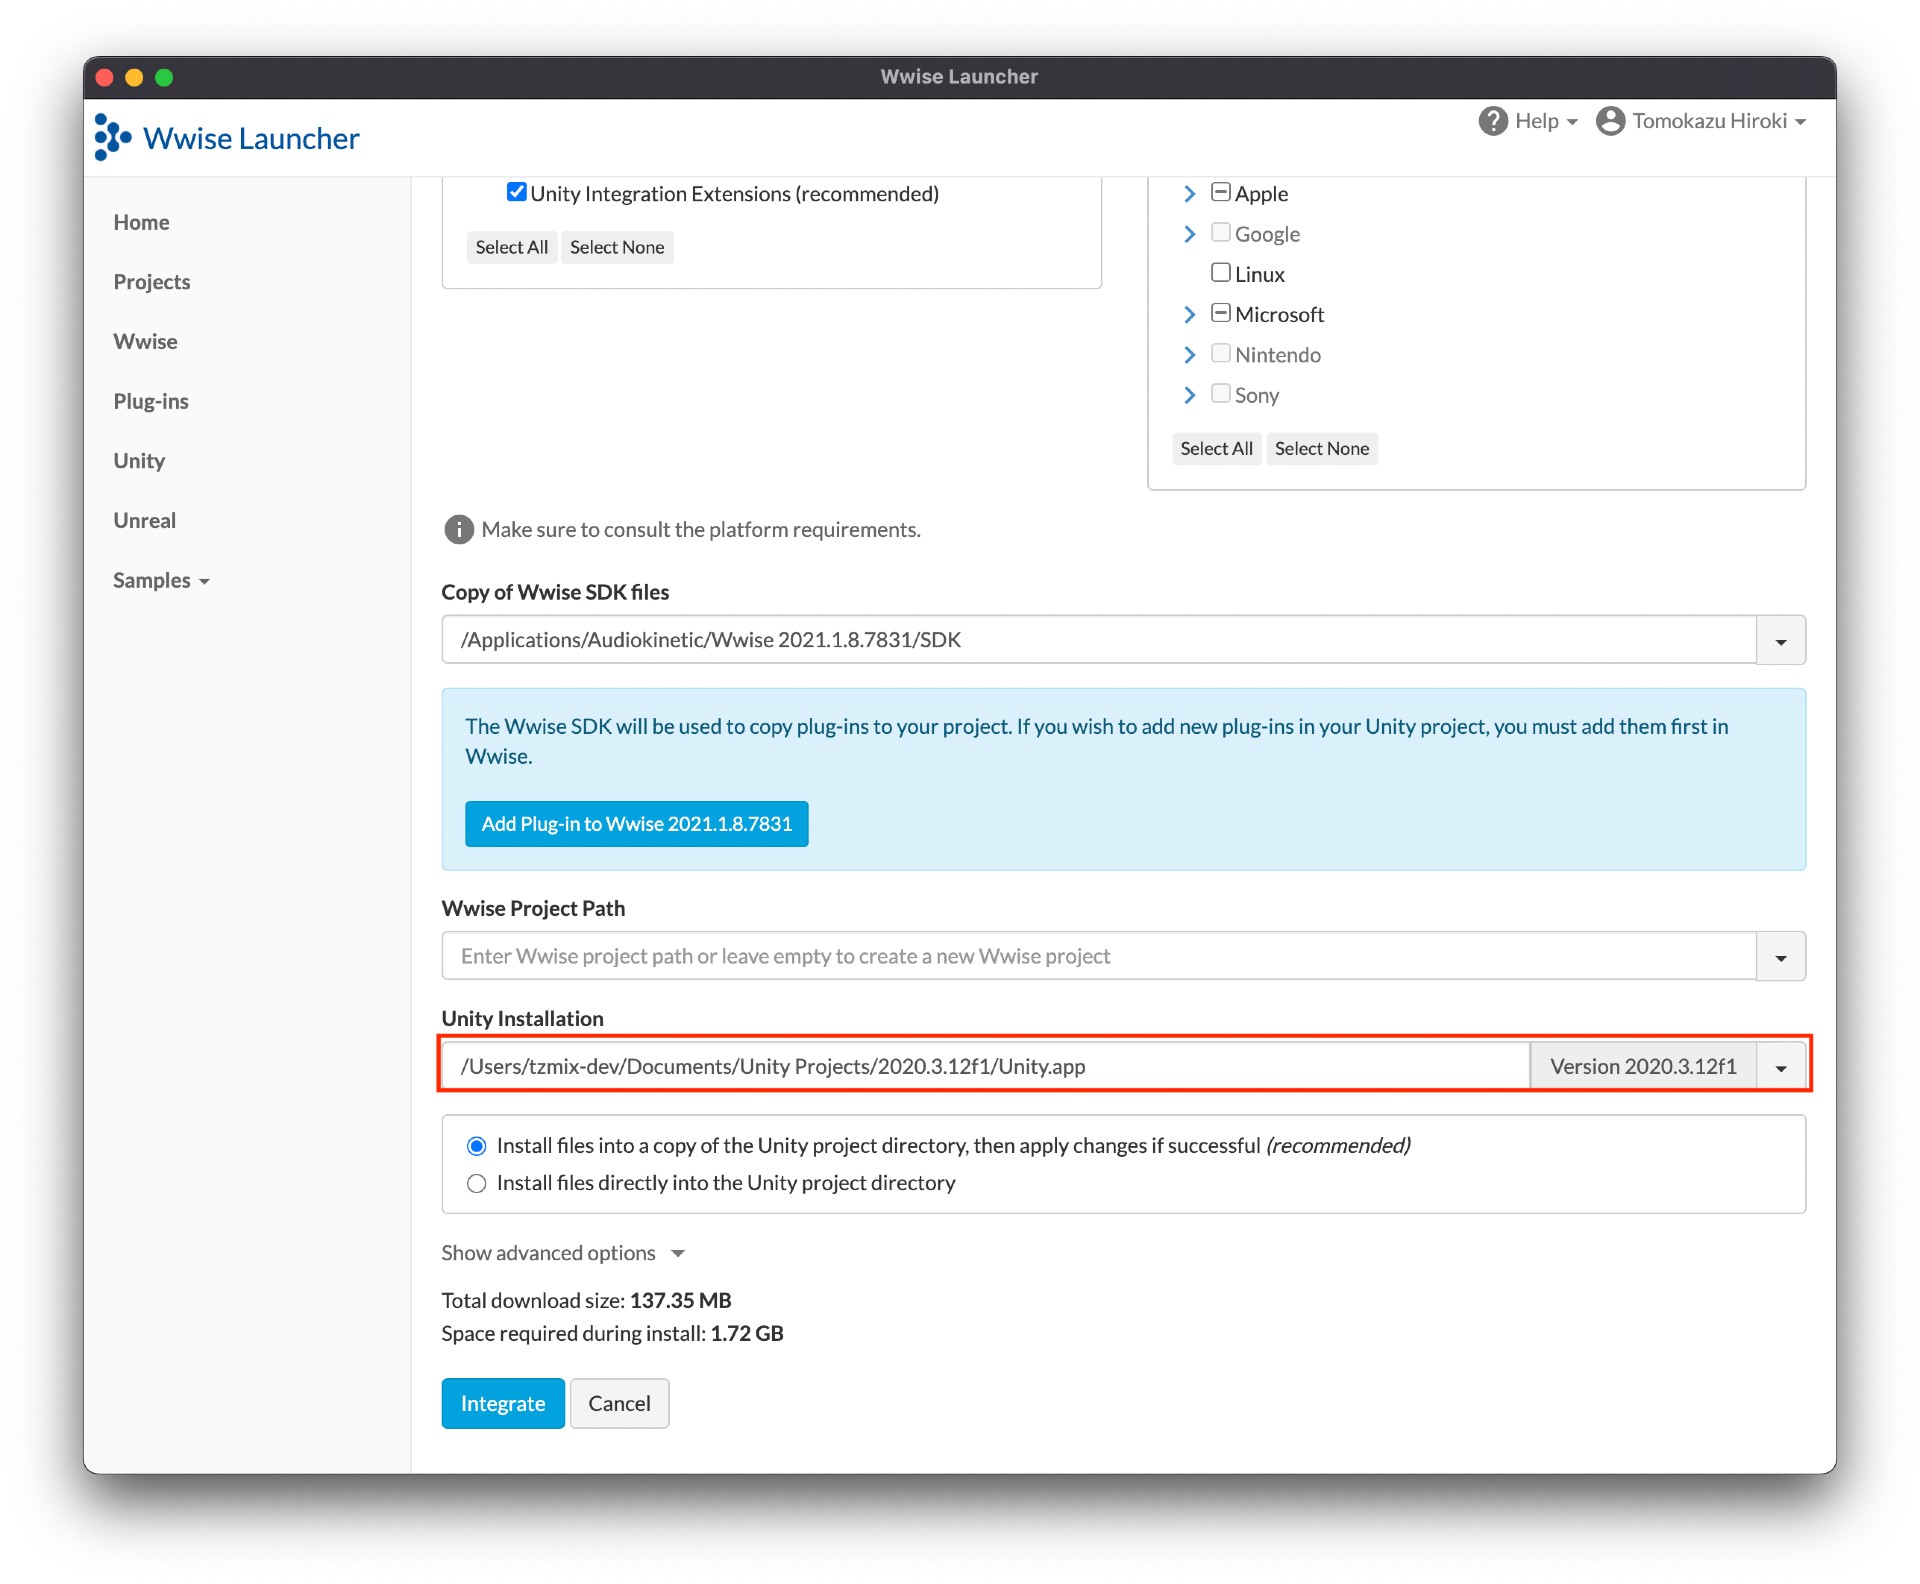
Click "Integrate", and the integration will begin automatically. You might not succeed if Unity Hub is open. If your integration fails, ensure that you closed Unity Hub.
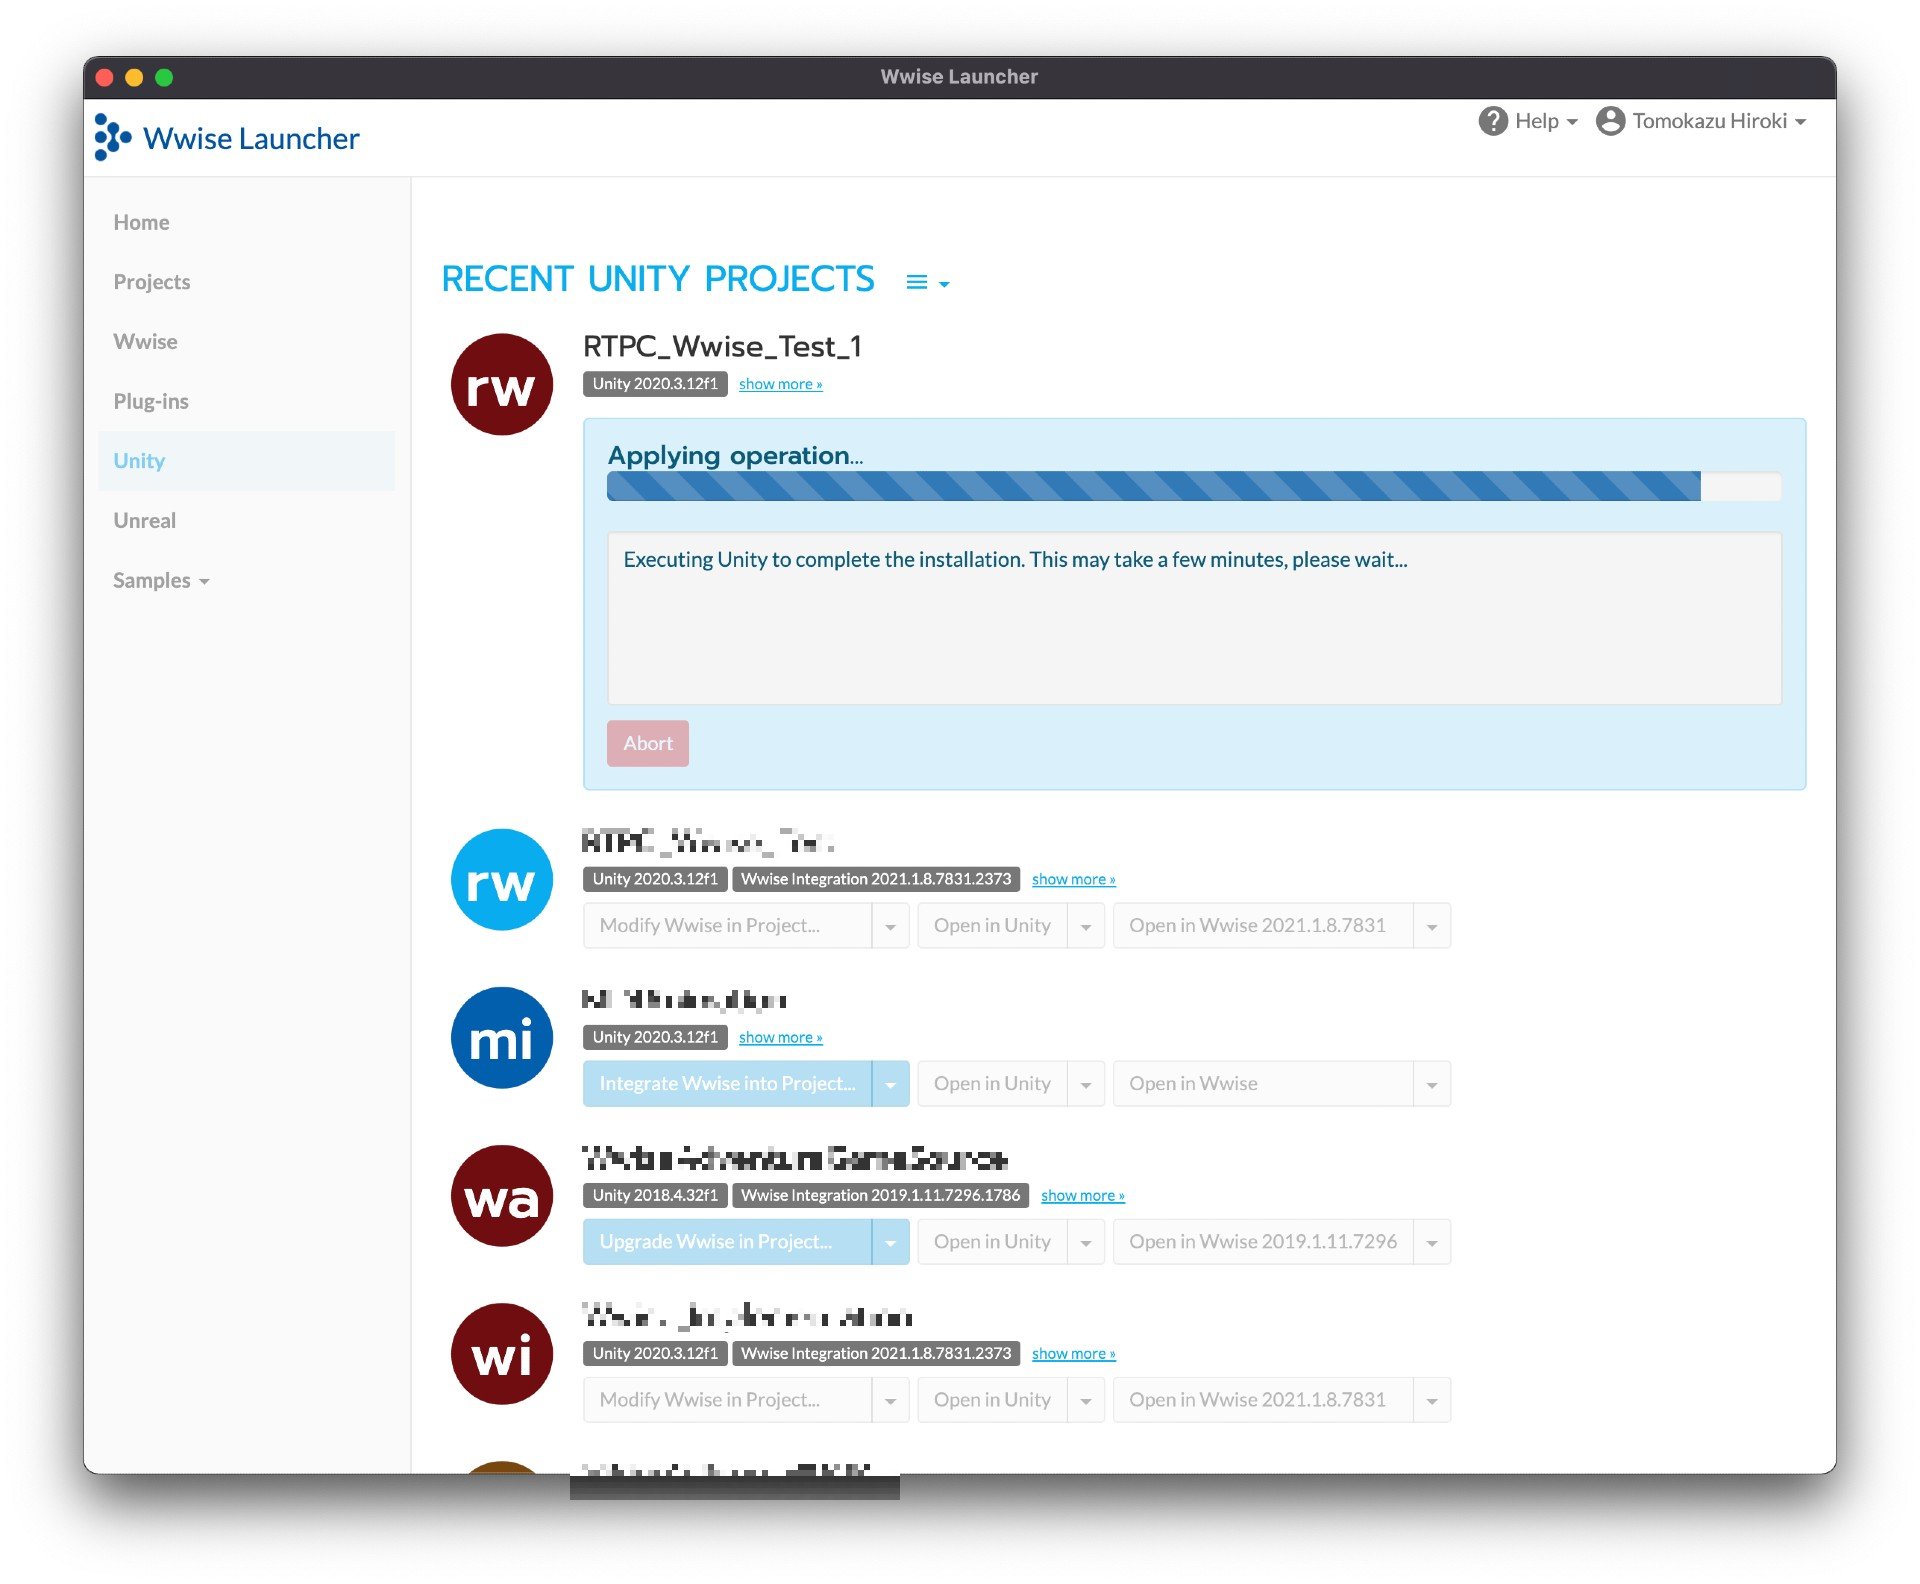
Once the operation has been completed, you will see the following. Now, the new option, "Open in Wwise", is available. The option "Open in Unity" is still grayed out, but it seems like this feature is not available on Mac, so don't worry. You can launch the Unity project in the usual way, from the Unity Hub.

Setting Up Wwise
Generating Sound SFX, Events, and SoundBanks
Next, let's go and set up Wwise. Launch Wwise from the Wwise Launcher by clicking "Open in Wwise 2021.1.8.7831". There are two Sound SFX objects in this project, Chill and RTPCtest. In RTPCtest, I put in a Wwise Sine as the source. After inserting it, in the General Settings tab, enable Loop to make it keeps on playing when you click Play. In Chill, I put in some sound sources for audio-reactive use. You can use whatever music you like.
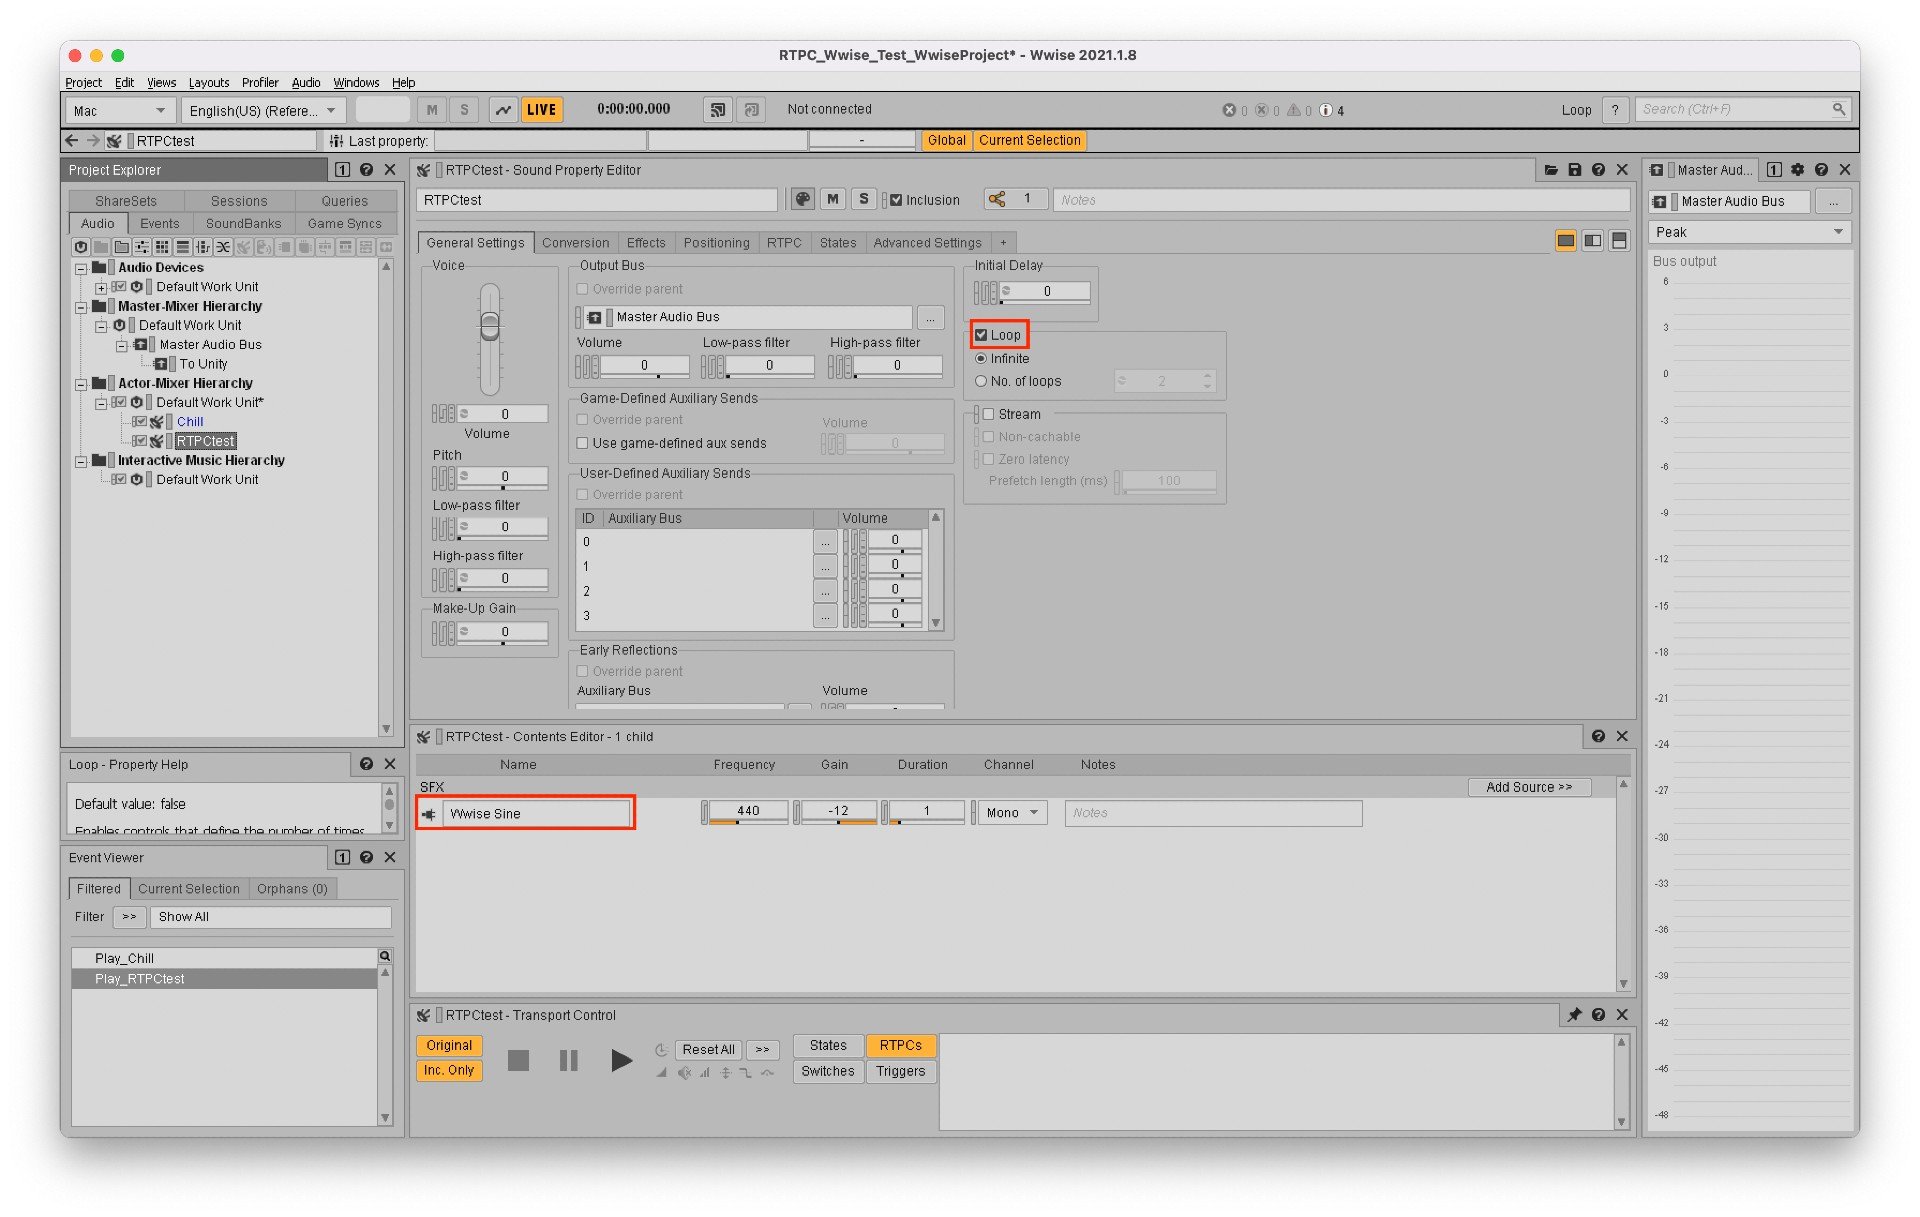
Create Play_Chill and Play_RTPCtest Play events, and generate the SoundBank. If you don't create the SoundBank, Unity will warn you that it is missing.
Creating a Game Parameter and Assigning it to an RTPC
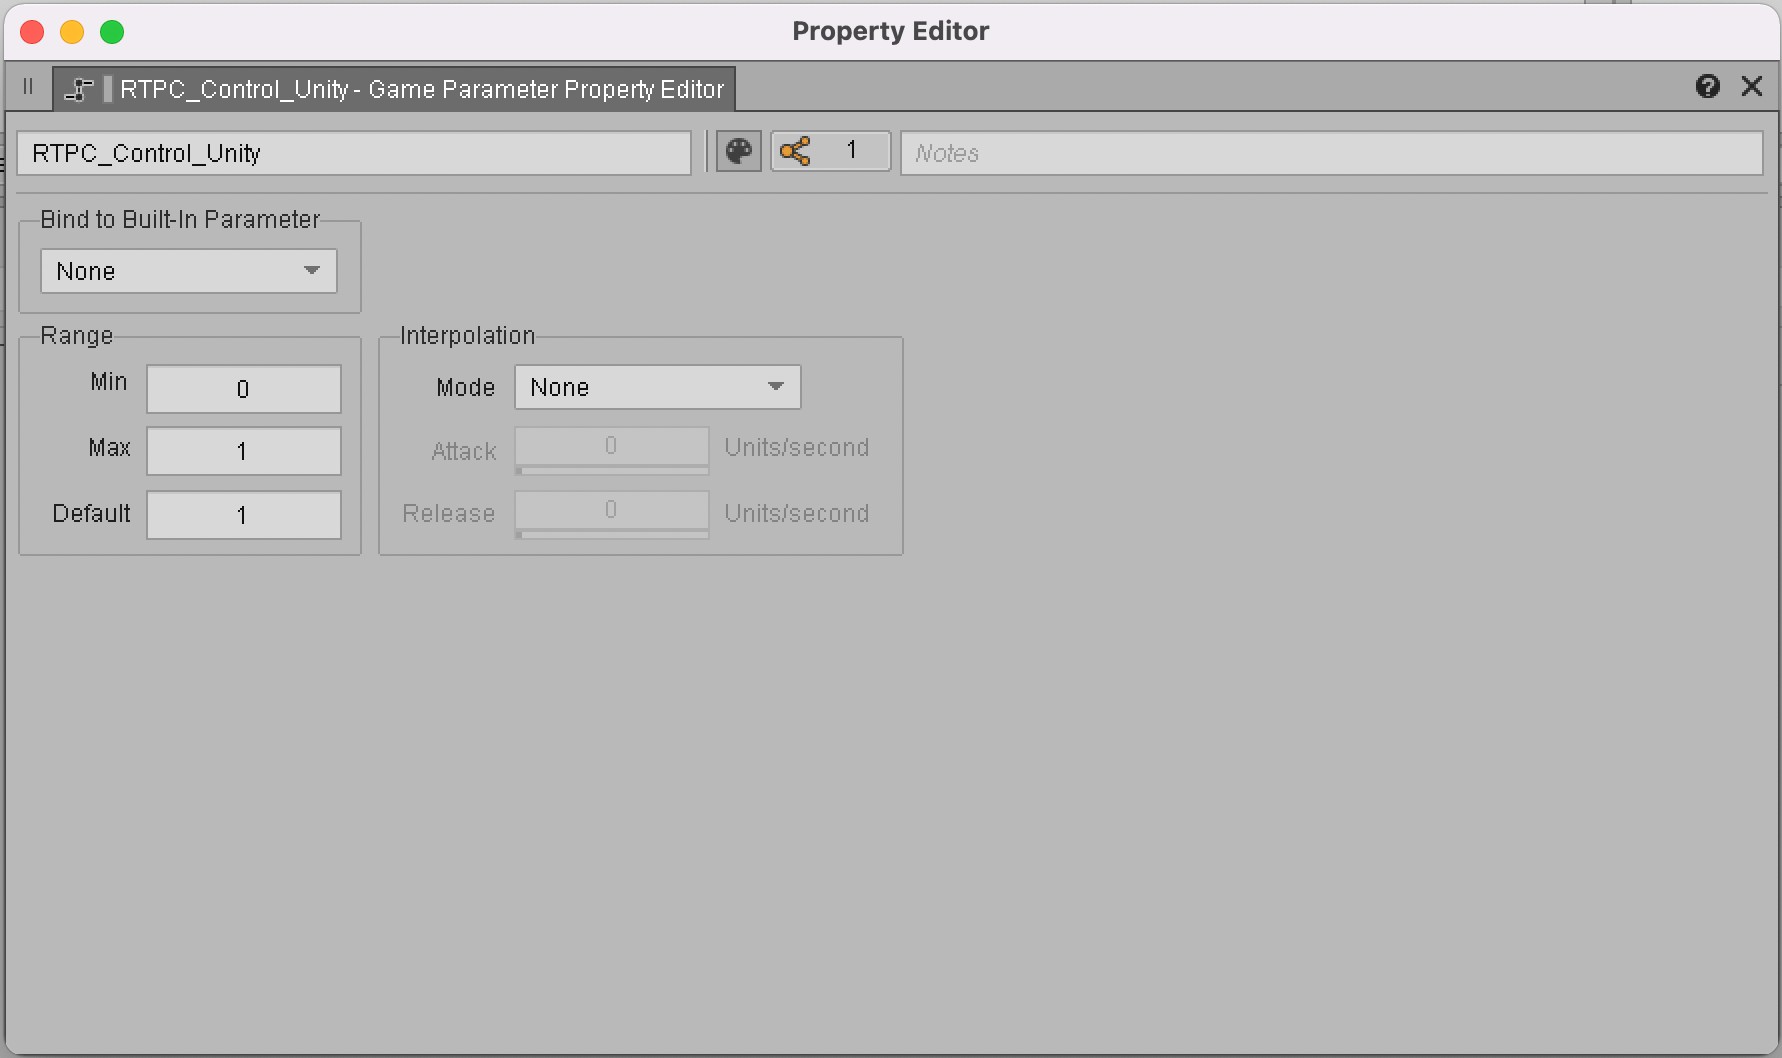
In the Game Syncs tab, create a Game Parameter and name it RTPC_Control_Unity.

Double-click the Game Parameter you just created, and open the Property Editor. Set the Max value to 1.
Go back to the Designer layout, display the RTPC of the RTPCtest Sound SFX object, and assign Voice Pitch to the RTPC_Control_Unity that we just created. Set the RTPC curve like this:
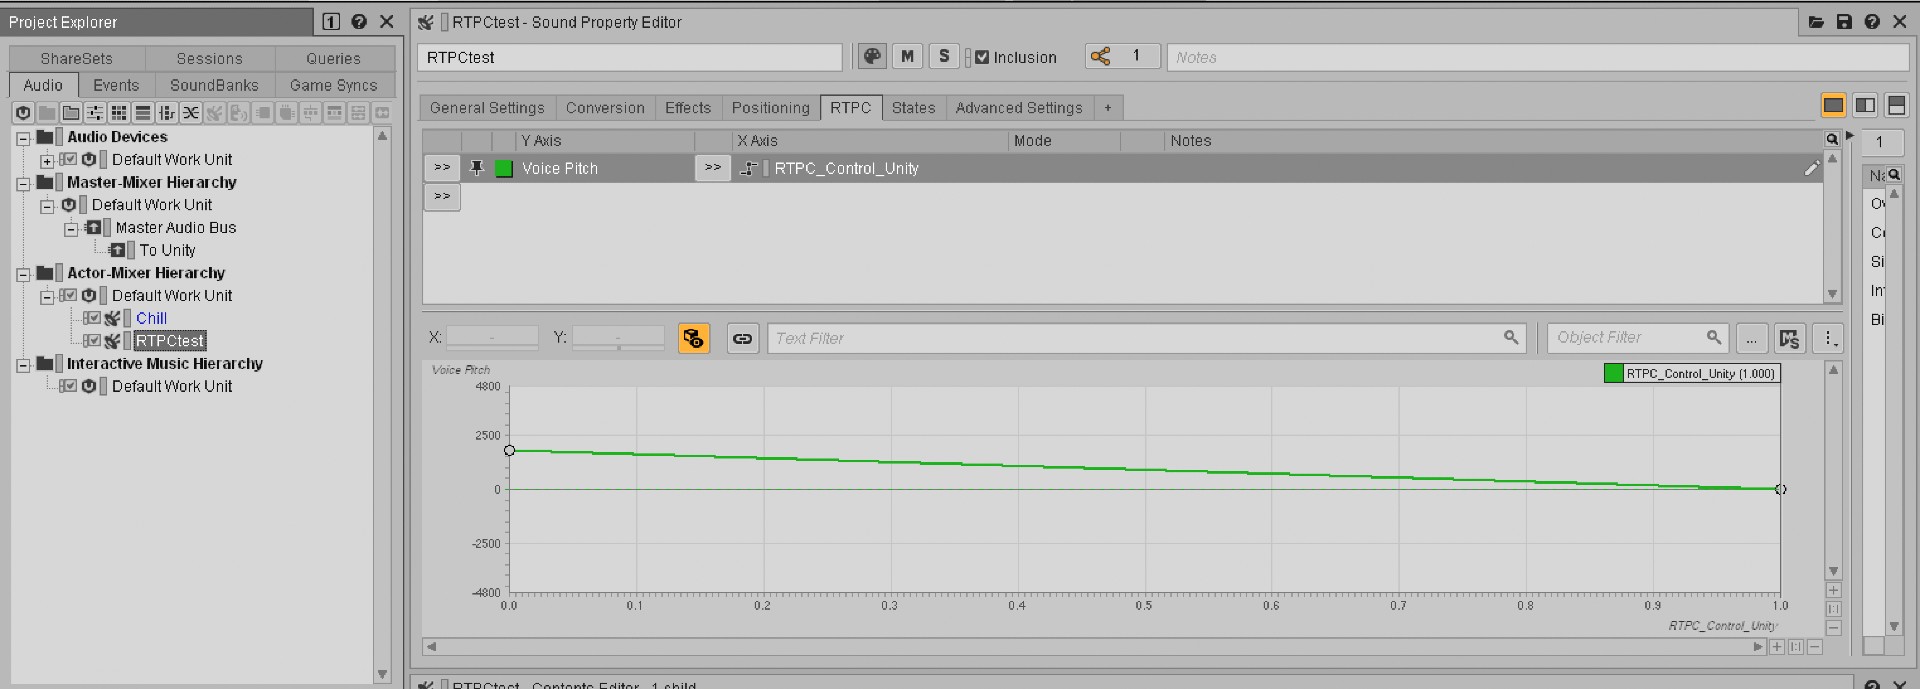
The RTPC for RTPCtest is ready to go. Next, let's set up the RTPC for audio-reactive use.
Preparing the Audio-Reactive Audio Bus and Setting an RTPC
We are going to create an Audio Bus and set an RTPC to it, so that we can use the level of audio signals to control Unity objects. Specifically, we are inserting the Meter plug-in to a new Audio Bus, and assigning an RTPC to the output.
First, under Master Audio Bus, create a new Audio Bus and name it "To Unity".
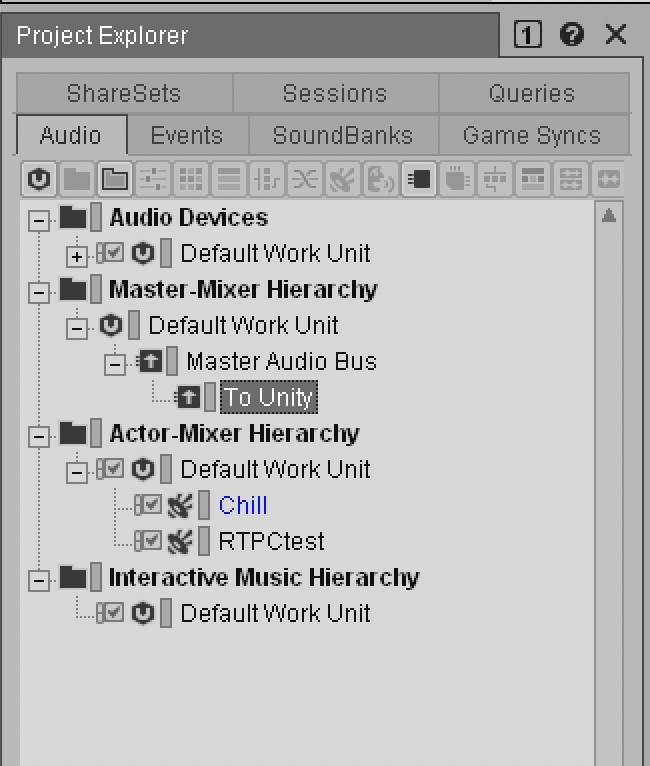
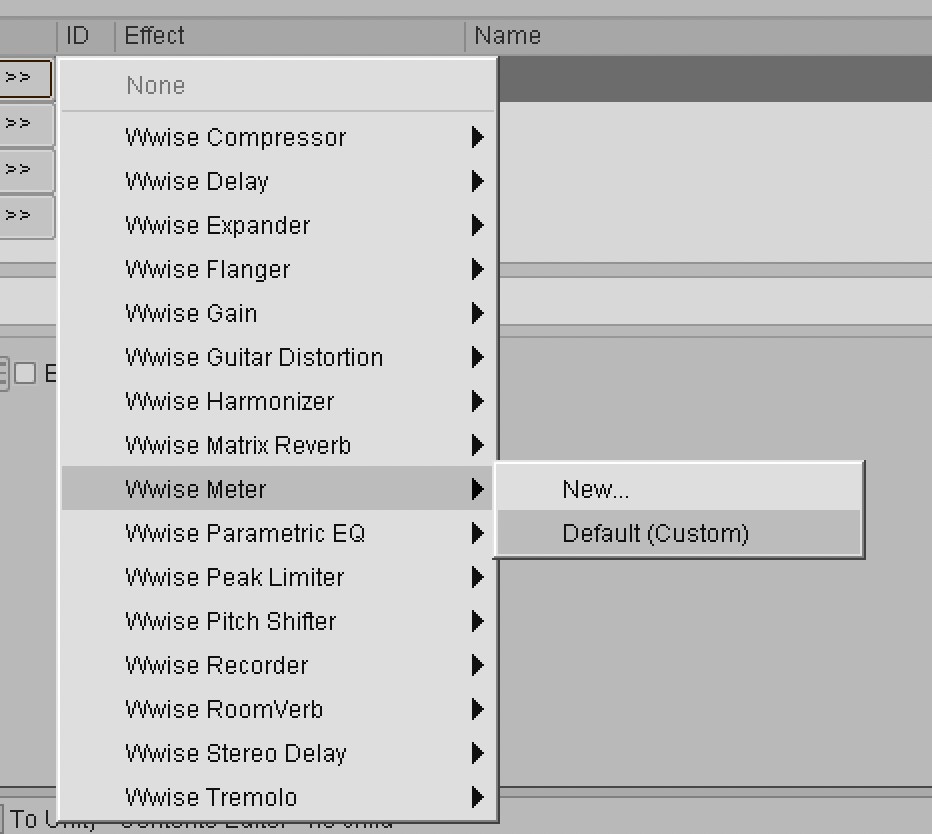
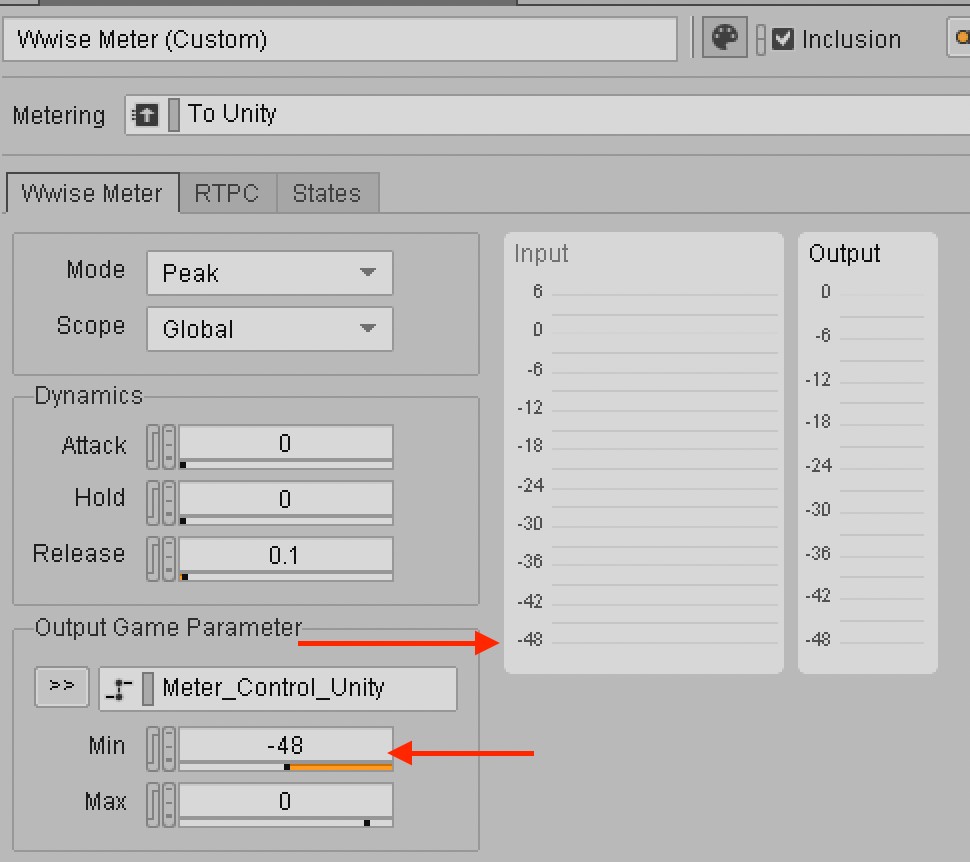
Open the Property Editor of the Audio Bus you just created, click on the Effects tab, and insert the Wwise Meter plug-in. When you insert the Meter plug-in, make sure to select "Default (Custom)" instead of "New".
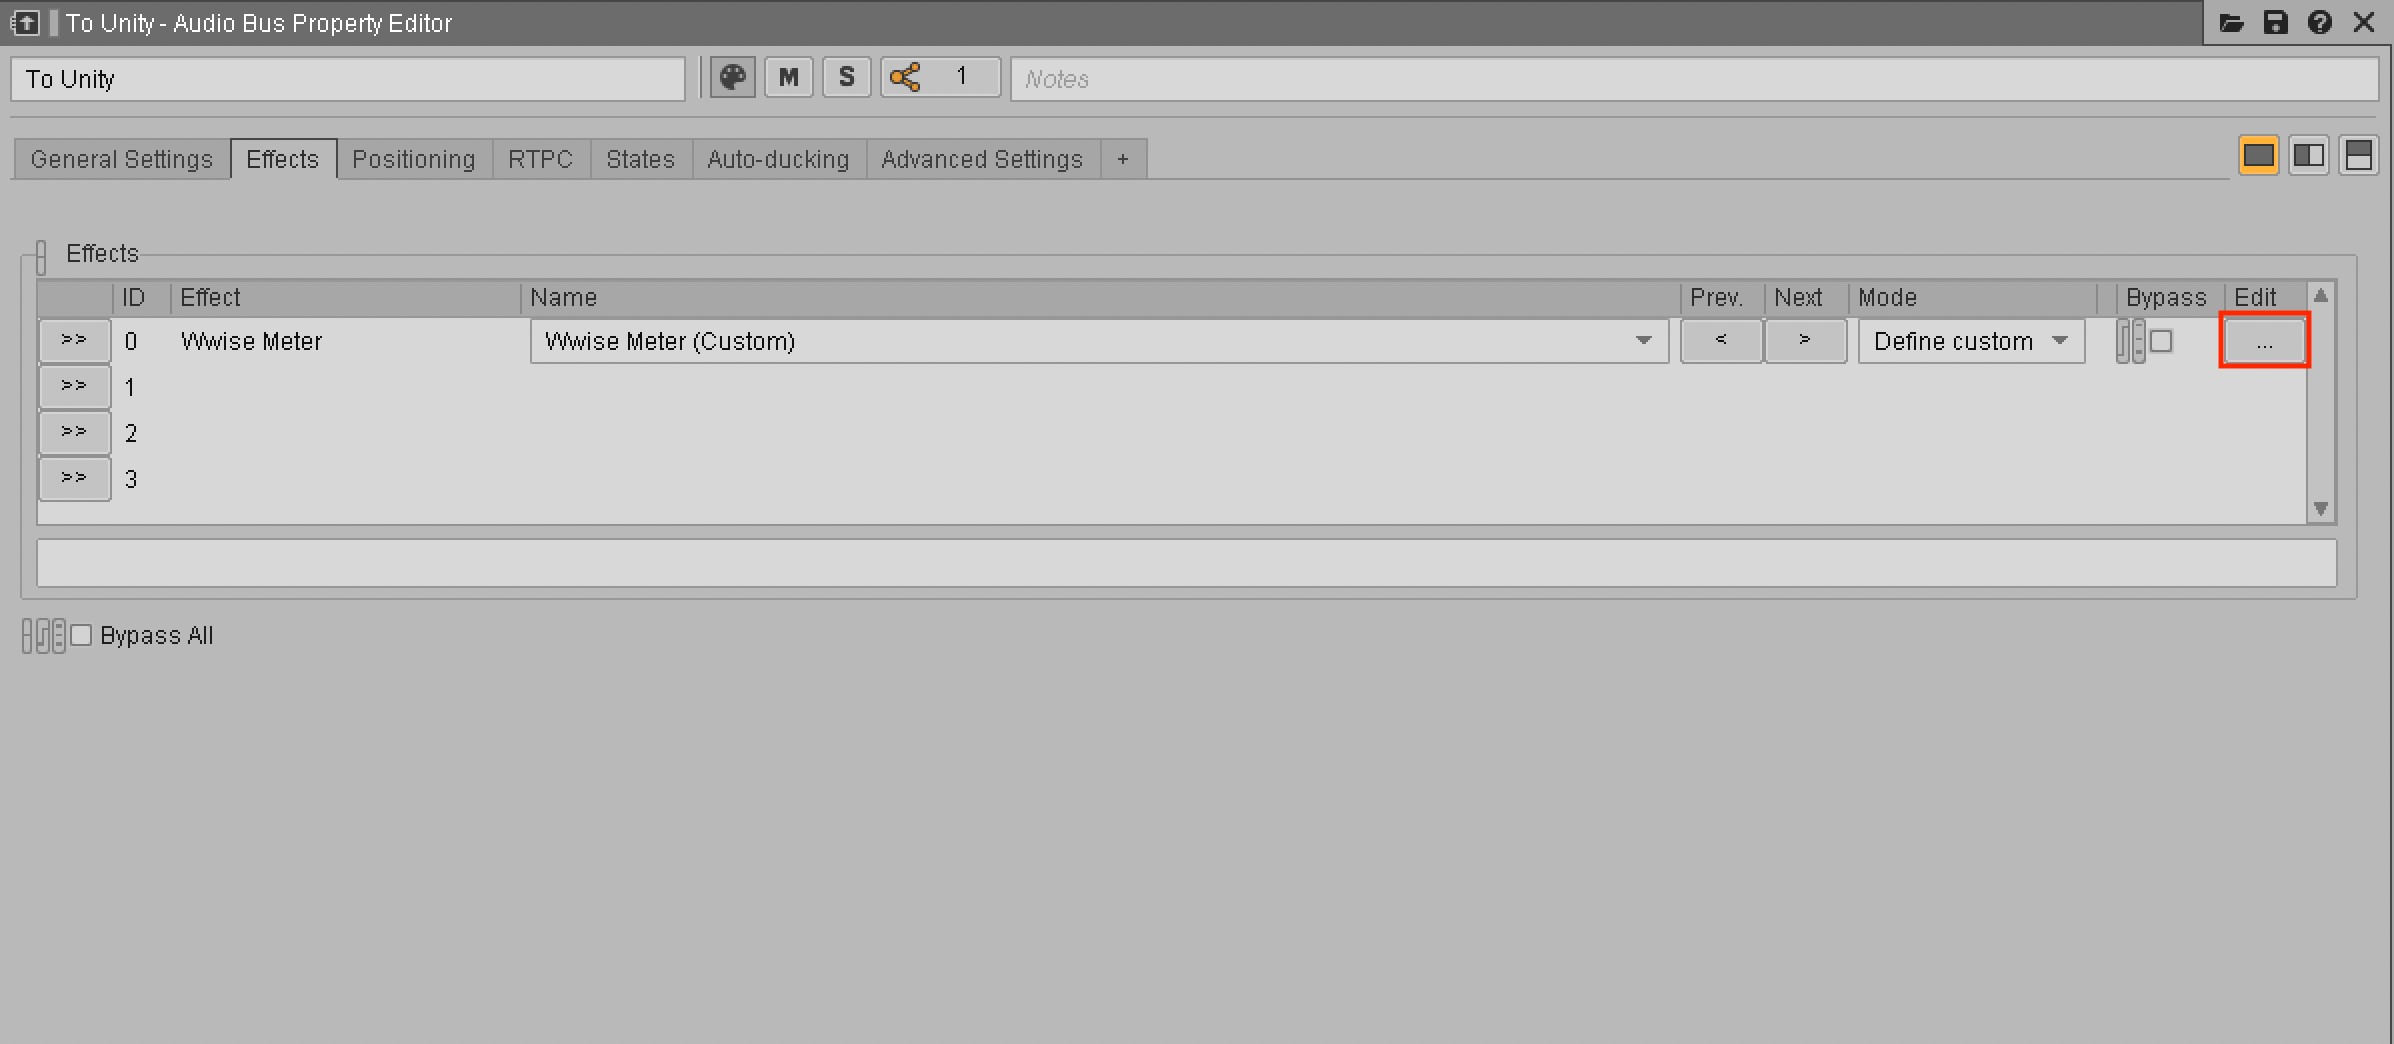
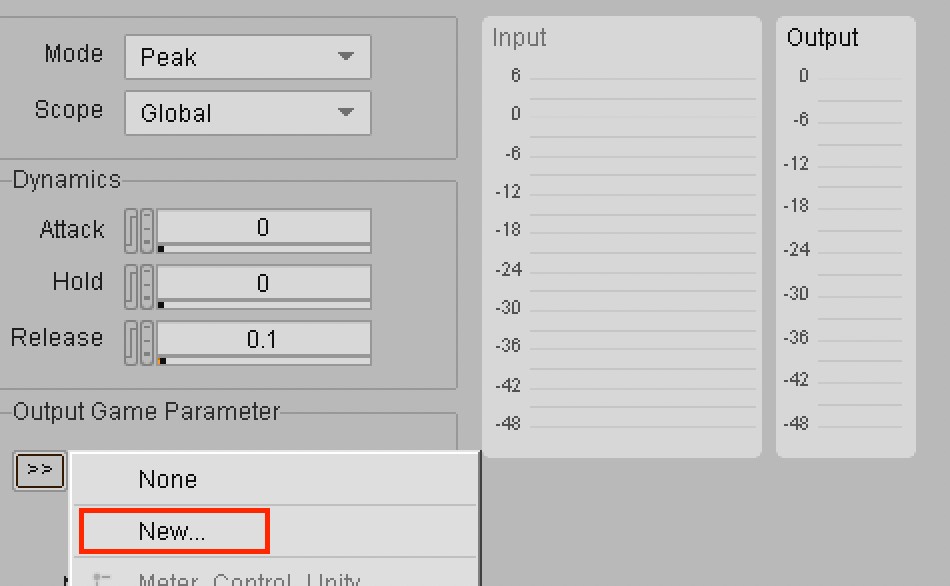
Press the Edit button on the far right side to open the Effect Editor. Under Output Game Parameter, press the Selector button, click New, create a new Game Parameter, and name it Meter_Control_Unity.
Finally, we'll output the music we want to use for Audio Reactive to this bus. Set the output of the Chill sound SFX object to "To Unity".

The Wwise settings for enabling Audio Reactive in Unity is complete.
Setting Up Unity
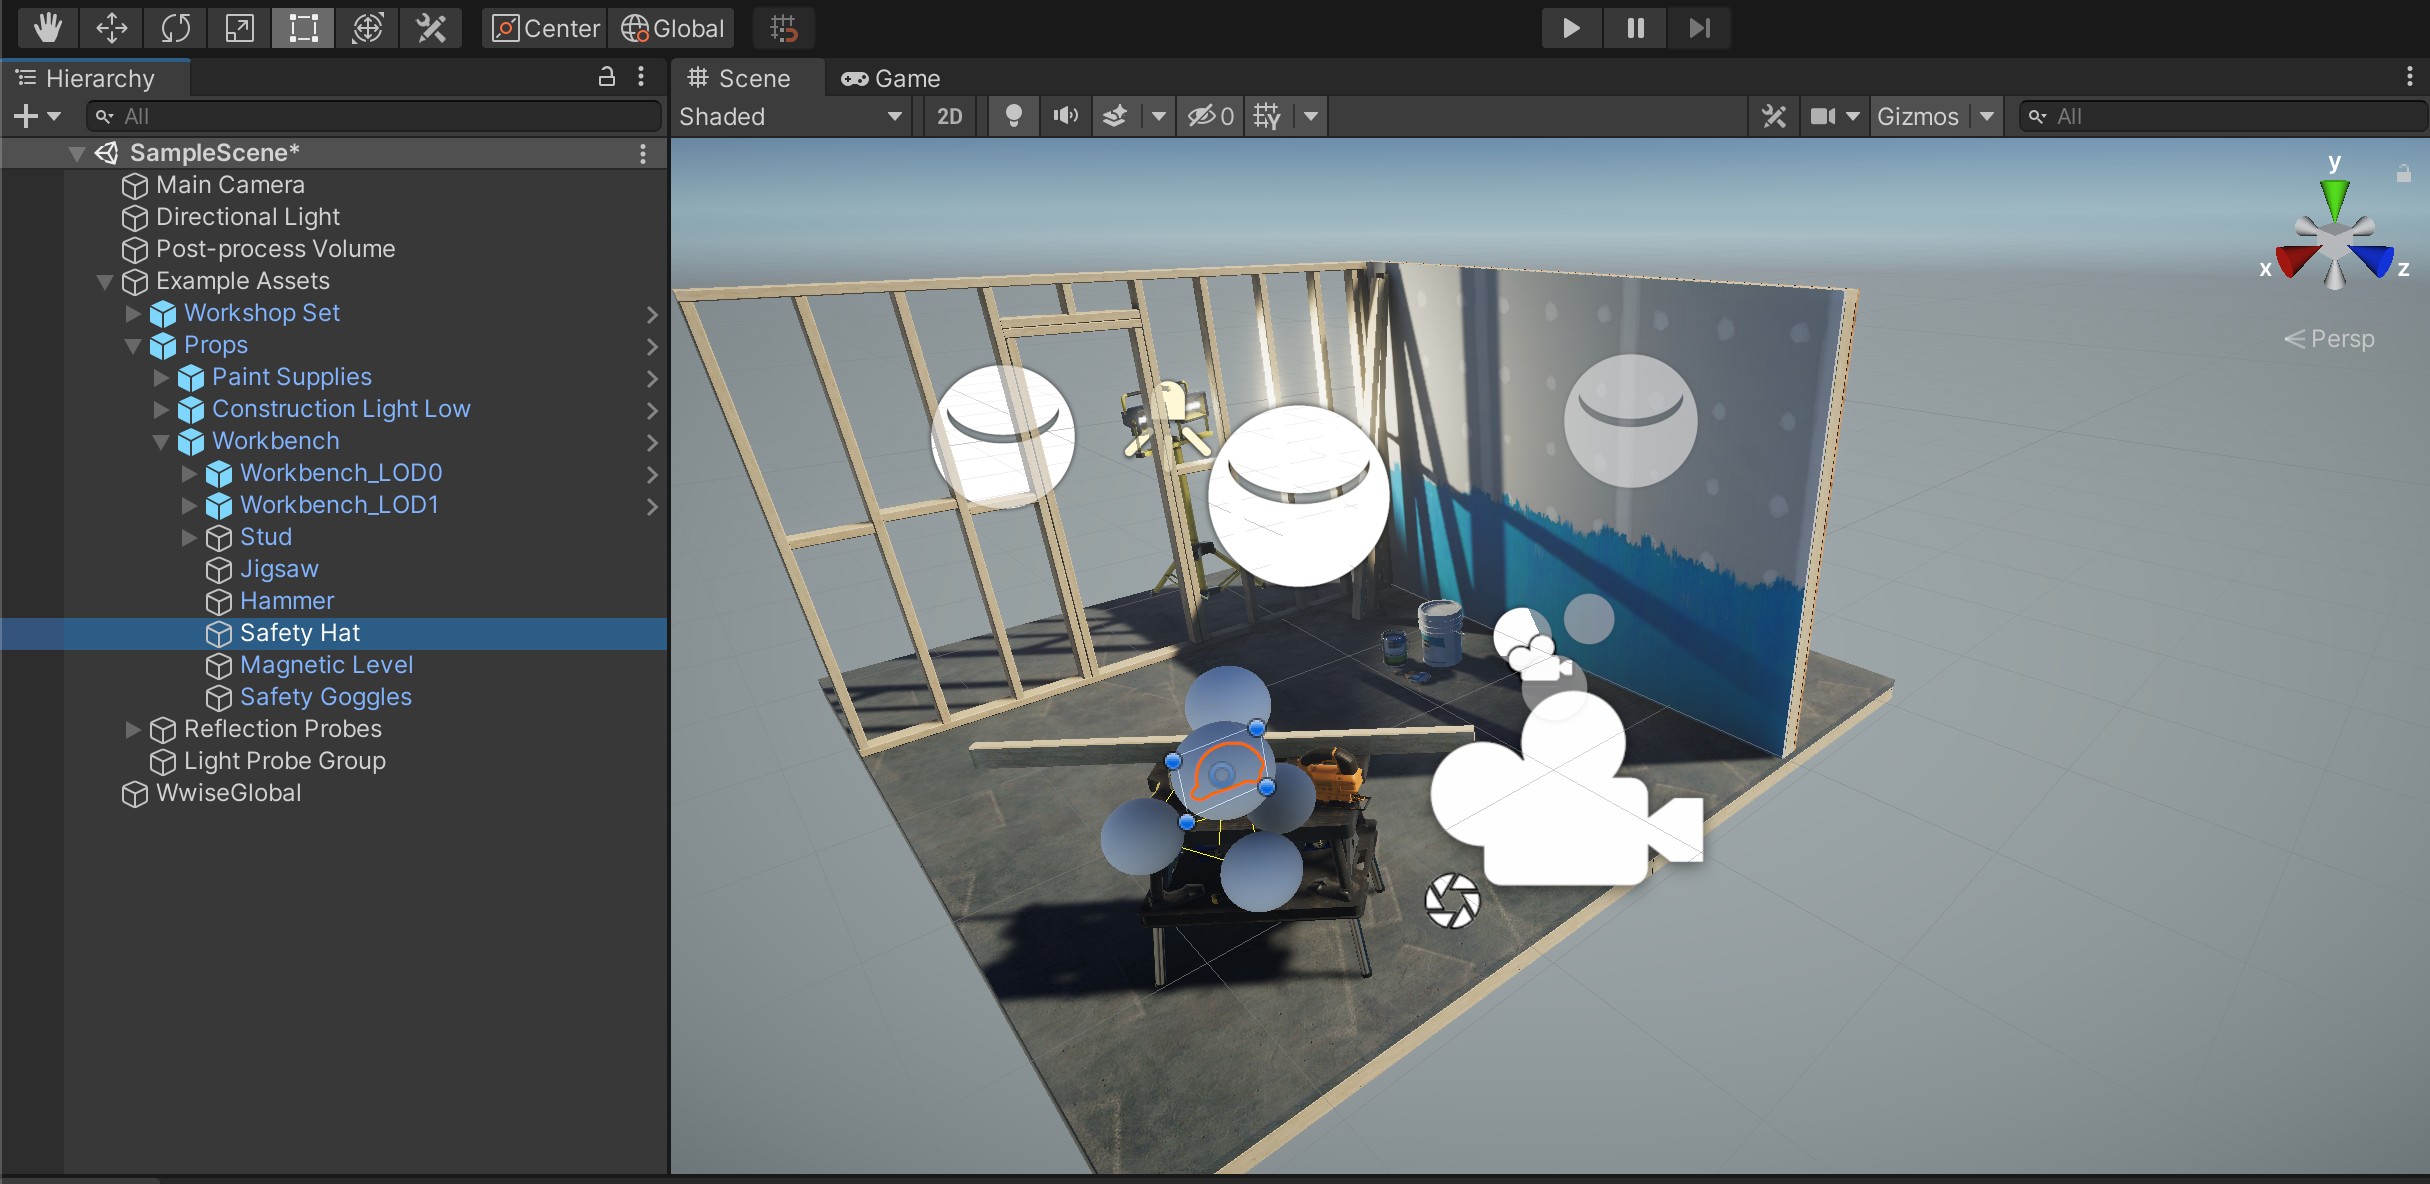
When you create a URP in Unity, it provides a sample scene of a construction site, just like the one shown below. Let's begin by creating a game object that changes size when we move the RTPC cursor in Wwise. We'll use the Safety Hat on the top of the table, and make it move.
Custom AkBank Scripts
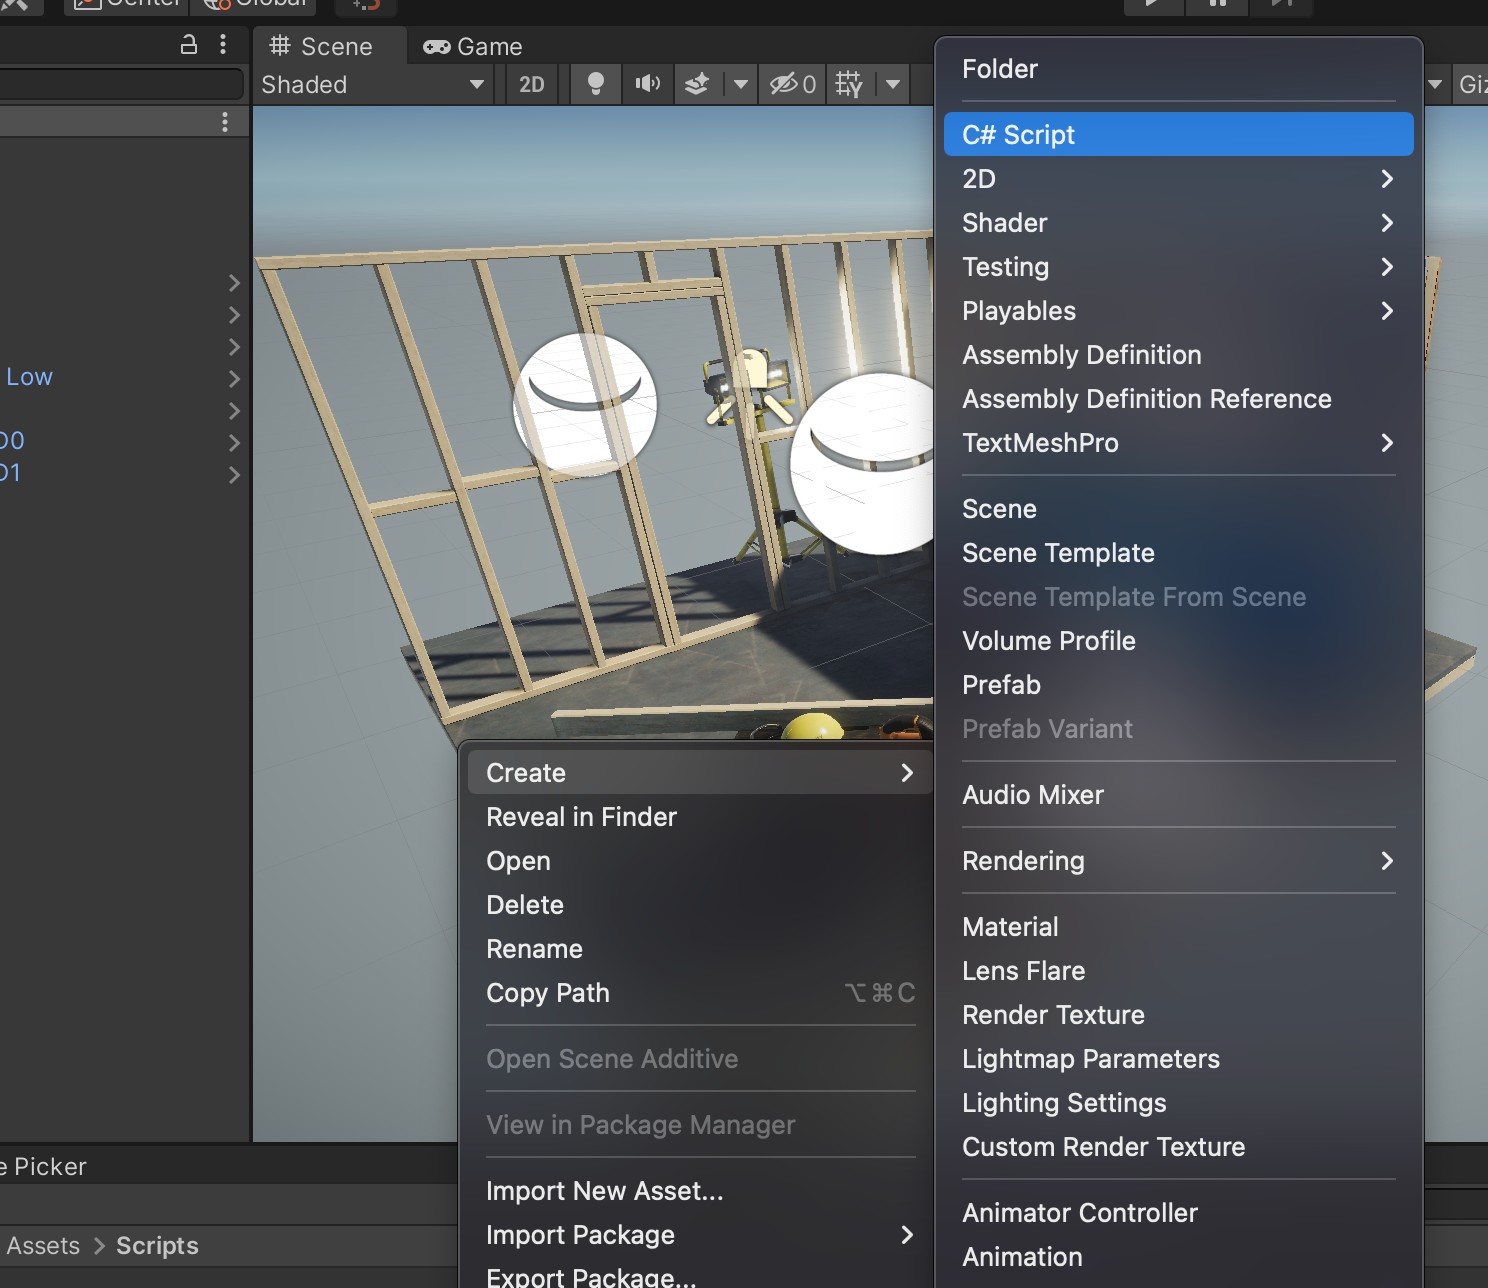
First, we'll write the script to load the SoundBank. We can use the AkBank script available in Wwise, but since we won't be using most of the features, we'll prepare a customized script. From the Project window, go to Asset > Script folder, right-click the empty space in the folder, click Create > C# Script, and create a new C# script.
Name the new script "LoadBank". Double-click the LoadBank script to open it, and replace its content with the following:
using System.Collections;
using System.Collections.Generic;
using UnityEngine;
public class LoadBank : MonoBehaviour
{
public AK.Wwise.Bank soundBank;
// Start is called before the first frame update
void Start()
{
soundBank.Load();
}
}
This is just a simple script to load the SoundBank when the game starts. Save the script you created, and attach it to the WwiseGlobal object.
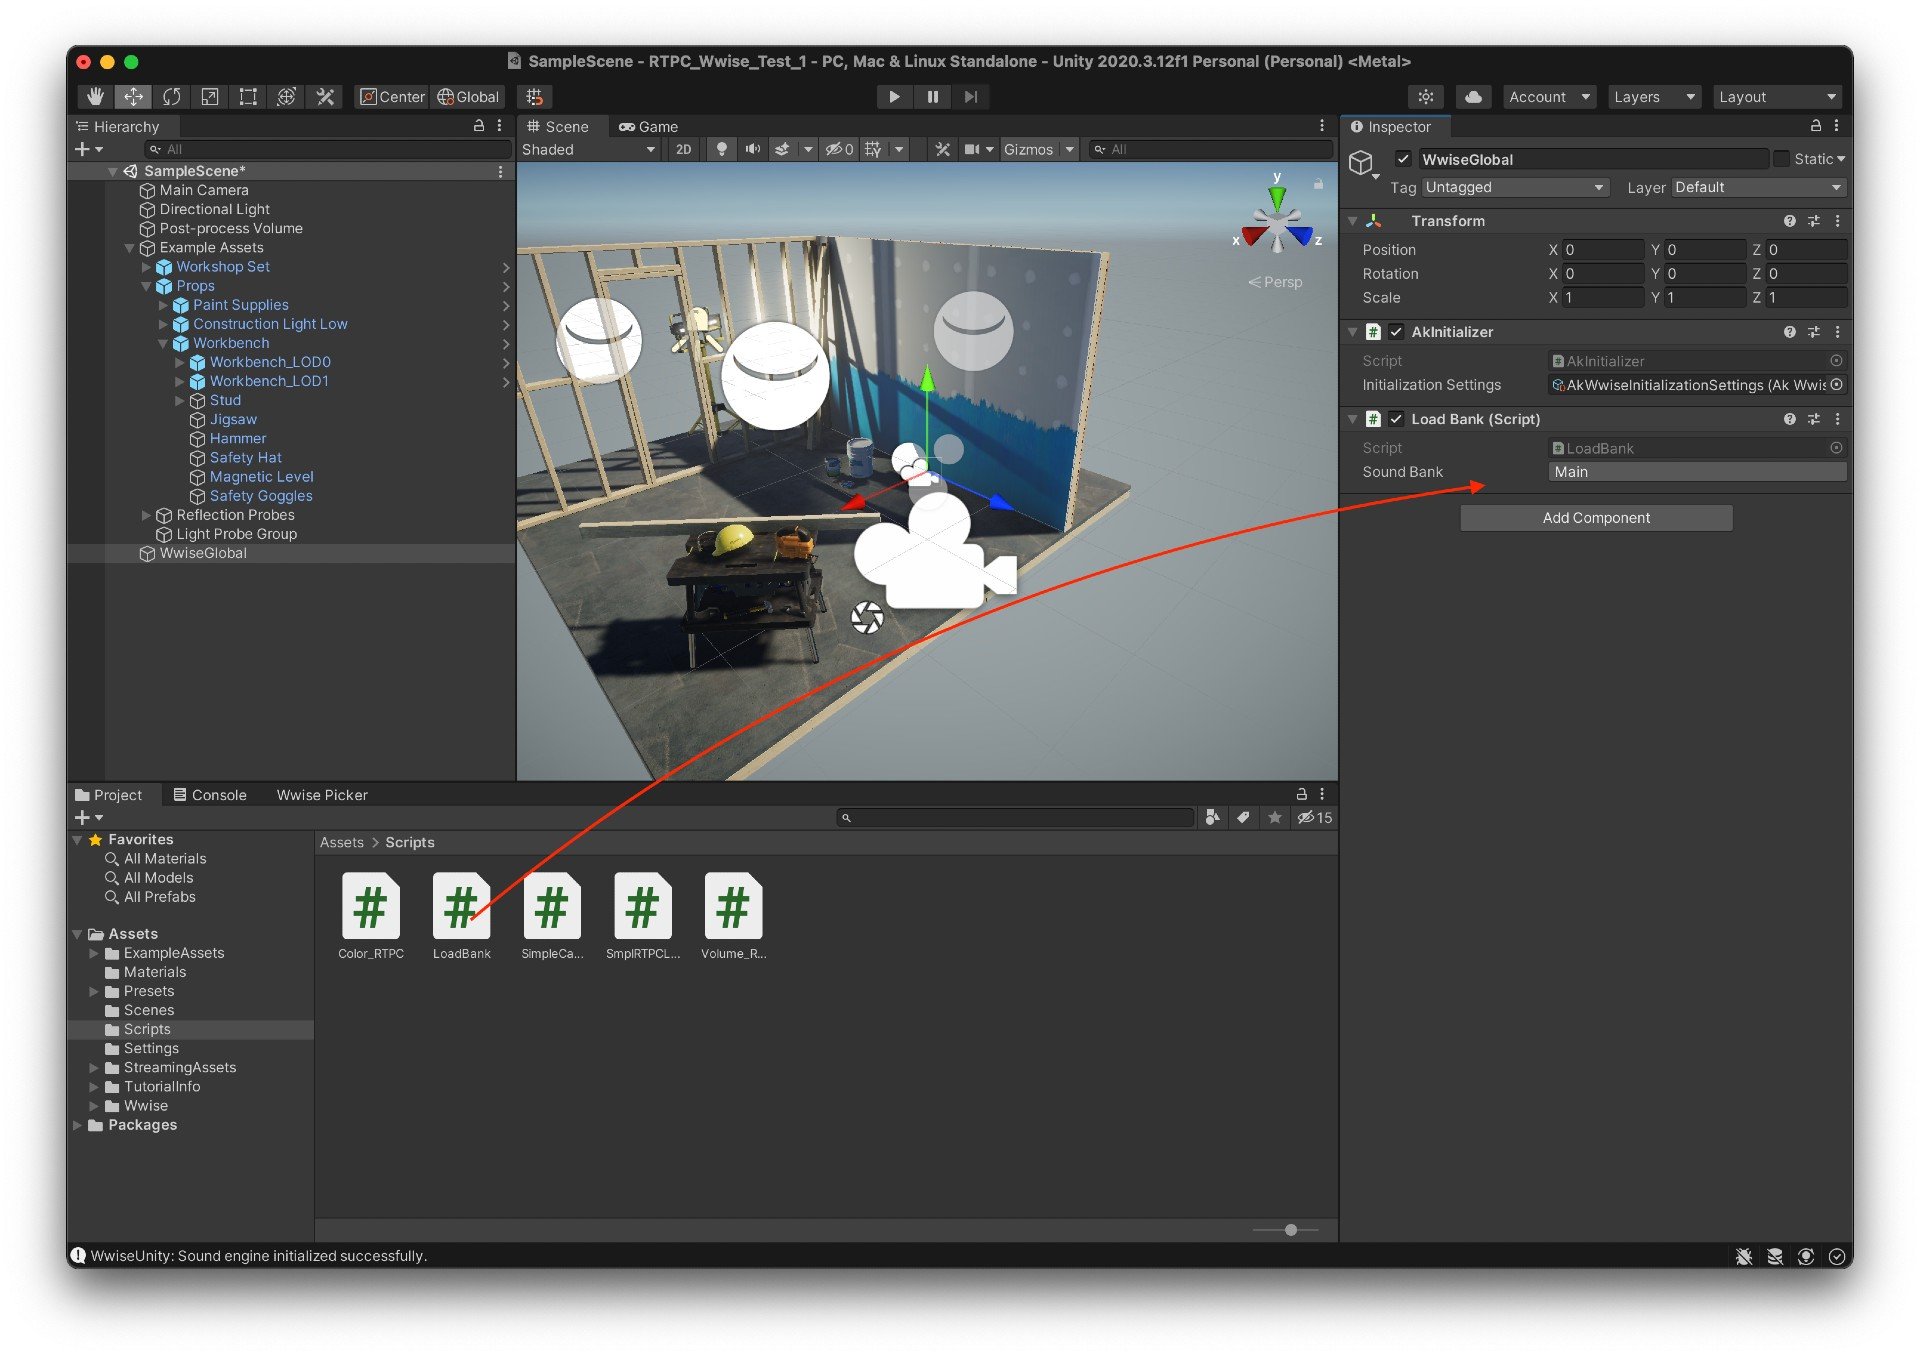
In the SoundBank section, select the SoundBank you just created in Wwise.
Script to Receive RTPCs and Modify Game Objects
Next, we'll create a script that receives the RTPC and uses it to change the scale of the game object.
We'll name this new script "SmplRTPCListner".
The following is the script that receives the RTPC and changes the size of the game object. Replace the content, and save it.
using UnityEngine;
public class SmplRTPCListener : MonoBehaviour
{
//set your RTPCID to the name of your desired gameparameter (under GameSyncs)
public AK.Wwise.RTPC rtpcID;
void Update()
{
// will contain the value of the RTPC parameter
float value = rtpcID.GetGlobalValue();
// which would scale by the value of the RTPC parameter
transform.localScale = new Vector3(value, value, value);
}
}
In the Hierarchy window, select the Safety Hat, and drag & drop this script onto the SafetyHat's Inspector window in order to attach it.
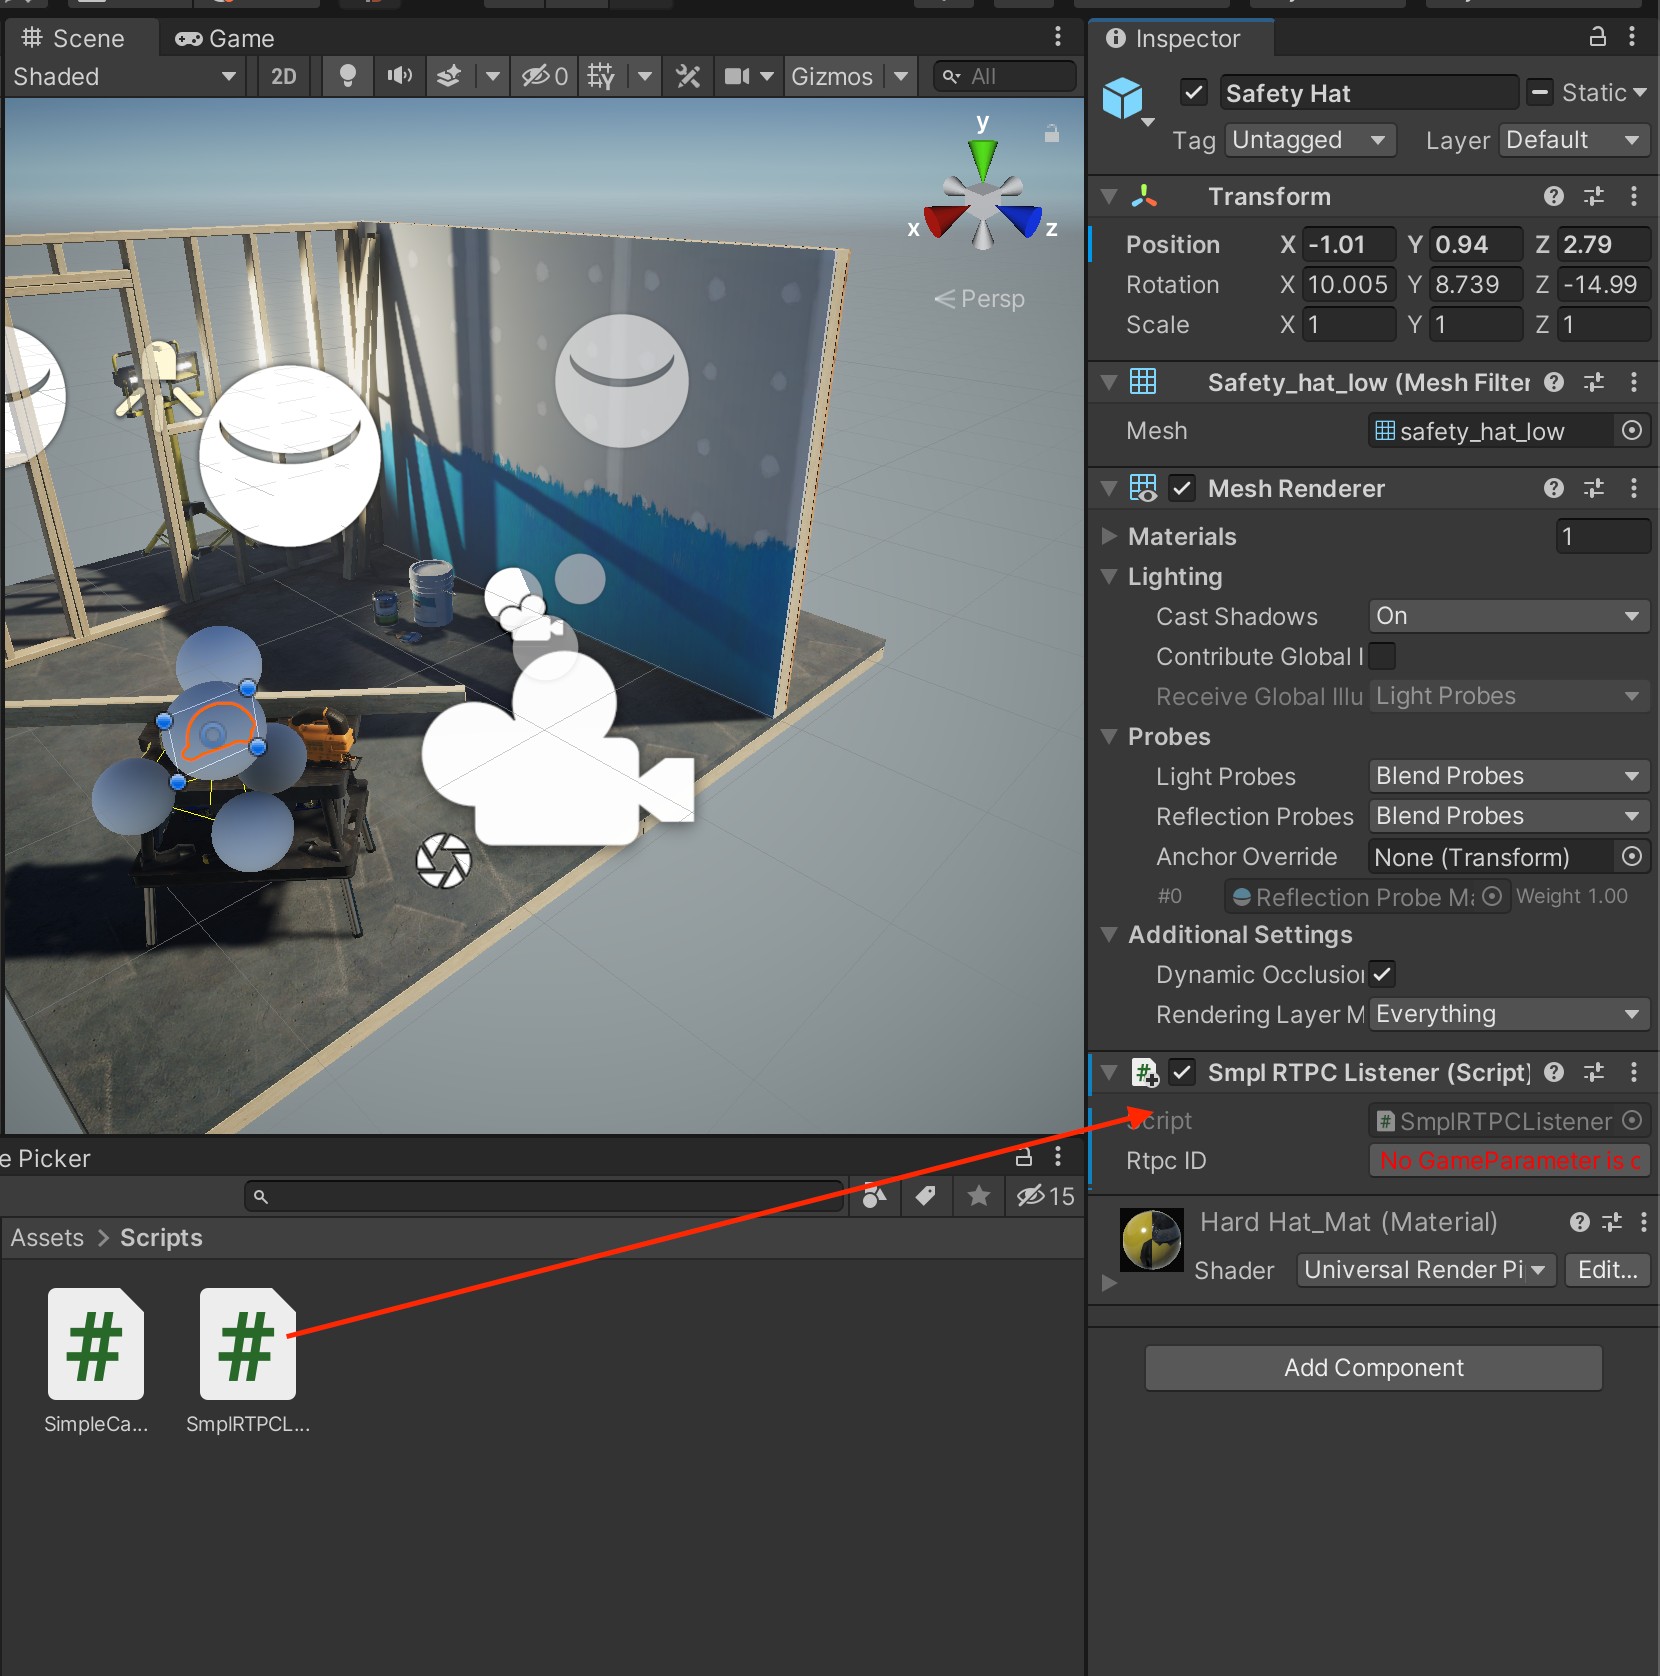
The RTPC ID indicates that No GameParameter is currently selected. This is because we haven't yet specified which GameParameter from Wwise to assign.
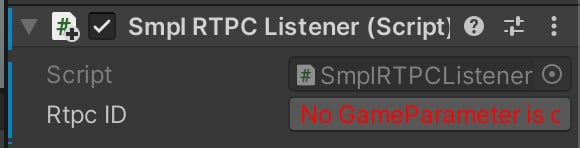
Click on it, and select RTPC_Control_Unity.

We're now ready to use the RTPC parameter cursor to change the size of the Safety Hat in Unity.
Testing With the RTPC Parameter Cursor
Connect Wwise to Unity, move the RTPC parameter cursor around, and test whether the game object does what we expect it to do.
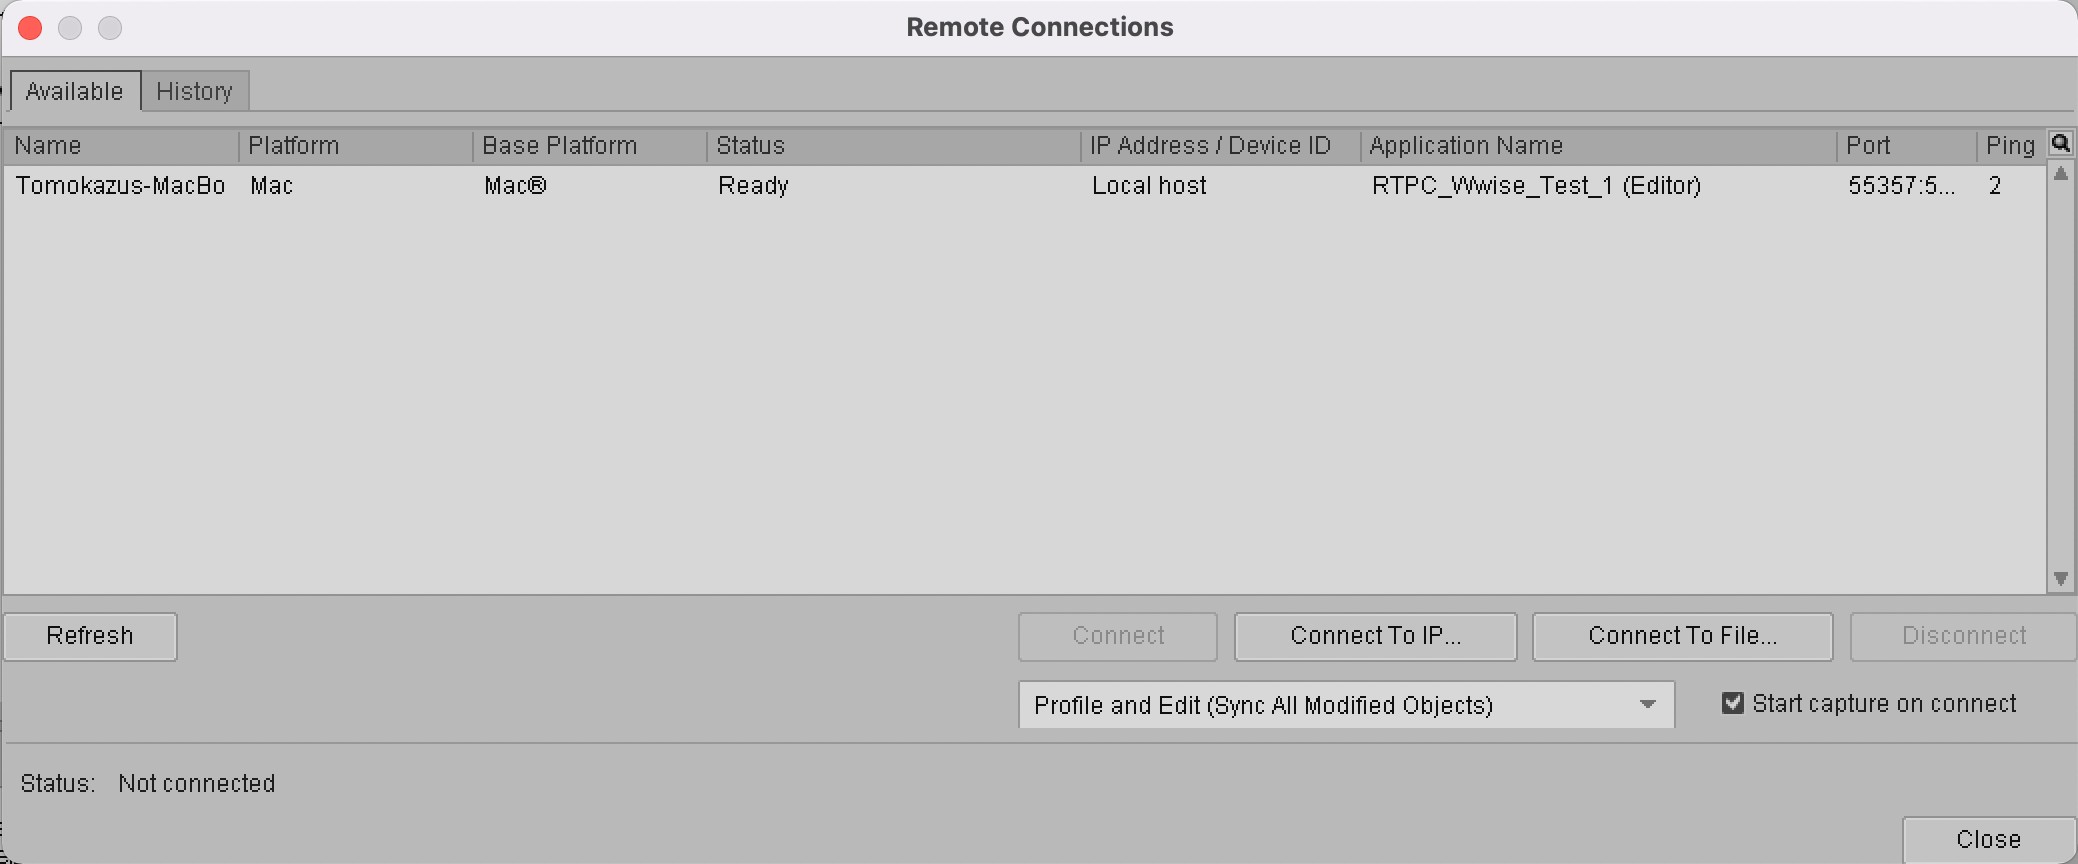
In Wwise, press Connect to Remote Platform (Shift + H).

Select your connection from the list, and connect to Unity.
In Unity, press Play. Press Play and play RTPCtest in Wwise, and move the RTPC parameter cursor like you saw in the video at the beginning of this blog.
How was it? Now you can use RTPC values to change the scale of game objects. As the object becomes smaller, the pitch increases, and as it becomes larger, the pitch decreases. You can modify the script so that it not only changes the game object's scale but also changes its position, rotates it, changes the material's color, and a range of other interactions. I will show you the script for changing material colors in the next section, where I discuss audio-reactive objects.
Audio-Reactive Objects
So far, we've discussed how to receive RTPCs and change the scale of a game object. Next, I want to show how to use audio signal amplitudes to make changes to the game object, instead of by moving the RTPC manually. The basic steps are the same, but we need to make some adjustments to the RTPC value being output by the Meter.
Using Custom Scripts to Receive Audio Meter Plug-in Values
The audio Meter's output range is -48 to 0.
It's inconvenient to have negative numbers when we're adjusting the scale, so we'll just add 48 and change the value range to be from 0 to 48. Now divide by 48, and the range becomes from 0 to 1. Based on this, below are the changes I made to the SmplRTPCListner script I wrote earlier:
using UnityEngine;
public class SmplRTPCListener : MonoBehaviour
{
//set your RTPCID to the name of your desired gameparameter (under GameSyncs)
public AK.Wwise.RTPC rtpcID;
public mySize;
void Update()
{
// will contain the value of the RTPC parameter
float value = (rtpcID.GetGlobalValue() + 48f) / 48f * mySize;
// which would scale by the value of the RTPC parameter
transform.localScale = new Vector3(value, value, value);
//transform.localPosition = new Vector3(value, value, value);
}
}
By multiplying it with the variable mySize, it becomes possible to adjust the size from Unity's GUI, too.
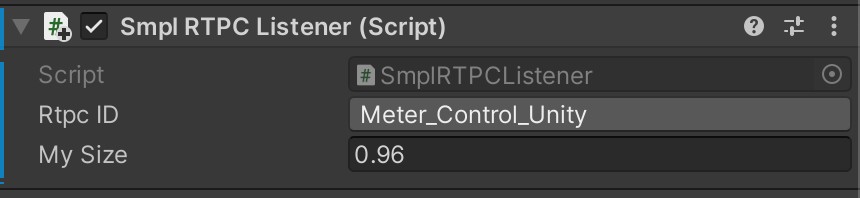
Set the RTPC ID to Meter_Control_Unity, and specify a My Size value of 0 or above.
Connect to Wwise and play back the music.
You can see how the game object moves along with the changes in audio level.
Changing the Material Color With the Sound
I also wrote a script that changes the color of the materials in response to sound.
using UnityEngine;
public class Color_RTPC : MonoBehaviour
{
//public Material ReferenceToMaterial;
public AK.Wwise.RTPC MyColor;
public Material ReferenceToMaterial;
//Adjust the intensity of the color
public float glow = 1f;
public float colorR;
public float colorG;
public float colorB;
// Update is called once per frame
void Update()
{
// will contain the value of the RTPC parameter
float value = (MyColor.GetGlobalValue() + 48f) / 48f * glow;
Debug.Log(value);
// which would scale by the value of the RTPC parameter
ReferenceToMaterial.color = new Color(value * colorR, value * colorG, value * colorB);
}
}
This is how it looks when you attach it to a game object:

You can drag & drop your material to Reference To Material. Next, in the My Color section, select Meter_Control_Unity like we did before. Use Glow to set your brightness, and Color R, G, and B to adjust your red, green, and blue colors respectively.
Now, the game object's material color, as well as its size, can change along with sound.
Conclusion
By controlling Unity from Wwise, you can create expressions in Unity that have never been possible before. By attaching the custom scripts we made to various game objects, you can instantly transform a boring construction site into a glorious party scene, like you saw at the beginning. I encourage you to build up on this, and create your own audio-reactive projects.
References
Using Lumote VFX to move Wwise
https://blog.audiokinetic.com/ja/lumote-using-wwise-to-drive-in-game-vfx/
Get RTPC value from Wwise in Unity
https://vraasp.wordpress.com/2018/01/19/getrtpc-in-wwise-2017-2-and-unity/
One Minute Wwise | Driving Visuals from Volume Output
https://www.youtube.com/watch?v=36eWf59E_TU
How can I access RTPC game parameters in Unity?
https://www.audiokinetic.com/qa/384/how-can-i-access-rtpc-game-parameters-in-unity
Akey Studio Wwise-110 Practical Exam Waiting List
https://akeystudio.com/en/wwise-110-course
Akey Studio Wwise-110 Certification Course
https://online.akeystudio.com/p/wwise-110-eng

Comments
Ludvig Berggren
August 25, 2023 at 08:30 am
Nice guide, but I have a question: How do you get the RTPC assigned to the Meter effect on the bus to bypass any 3D-effects of the sounds played? I want the RTPC to not follow attenuation curves that are active on the sound objects (such as making sound louder when the listener is approaching an emitter).