
Virtual Reality is quickly becoming the hottest production topic on the interactive audio scene. Audio for virtual reality offers a wealth of new design and implementation directions, and a wide range of unanswered questions and undiscovered territory. If you are at the beginning of a virtual reality project and have decided to use Wwise and AURO-3D for your pipeline, then these beginning steps should help you move past the starting line.
First, let’s go over a few of the main topics.
In order to develop a full immersive experience, Virtual Reality requires audio that responds to movement and location in a 360 degree field. A common question on this topic might be “Isn’t that what surround sound accomplishes?” The short answer is no, it doesn’t.
What is 360 degree audio?
One way to think of 360 degree audio is to conceptualize stereo and surround sound playback in terms of dimensions.
Stereo sound playback is one-dimensional because it can be described mathematically as existing along the X axis. The X axis in this case represents a left to right line in front of the audience. A stereo mix offers the audience a “sweet spot” where the listener will receive the most accurate positional information.
Surround sound playback is two-dimensional because it can be described mathematically as existing along the X and the Y axis. The Y axis in this case represents a line which exists from the front to the back of the listening position. A Surround mix also offers the audience a “sweet spot” where the listener will receive the most accurate positional information.
360 degree audio is three-dimensional because it can be described mathematically as existing along the X, Y, and Z axis. The Z axis in this case represents a vertical line running from the bottom to the top of the audience listening field.
With the addition of head tracking in a Virtual Reality system, there is (theoretically) no sweet spot since the real-time mix will move relative to the location of the listener within the virtual space itself. This, of course, depends on the developer's ability to design and offer an audio field that responds correctly to the real time object based system in Wwise. This is where AURO-3D comes into the picture.
What is AURO-3D?
Without getting too deep into the details of the AURO-3D technology, please take a moment to go to their site and read over their approach to 360 degree audio.
In relation to Wwise and game audio development, AURO-3D is the 360 library that will translate the real-time audio mix from Wwise into a real-time binaural mix. A binaural mix will offer the audience an audio experience that is closer to the way humans actually receive and interpret audio in the real world. Xavier Buffoni at Audiokinetic wrote a fantastic blog which will help you understand object based audio as it relates to a binaural mix and its routing scenarios. I suggest digesting it as soon as possible.
Please note that a real-time binaural mix like the one offered with the AURO-3D system is not the same thing as a binaural recording. A binaural recording has positional location and movement built into it, whereas we are discussing the objects within your interactive title being processed through a binaural mix system. A real-time binaural mix requires the interactive decisions of the audience, and cannot be premixed as would be the case with a binaural recording. That being said, if you are familiar with the binaural recording process and how it works, then you will have a head start on this topic.
Setting up Wwise and AURO-3D
AURO-3D for Wwise consists of two different components.
- AURO Headphones
- AURO Panner
Setting up AURO-3D with Wwise
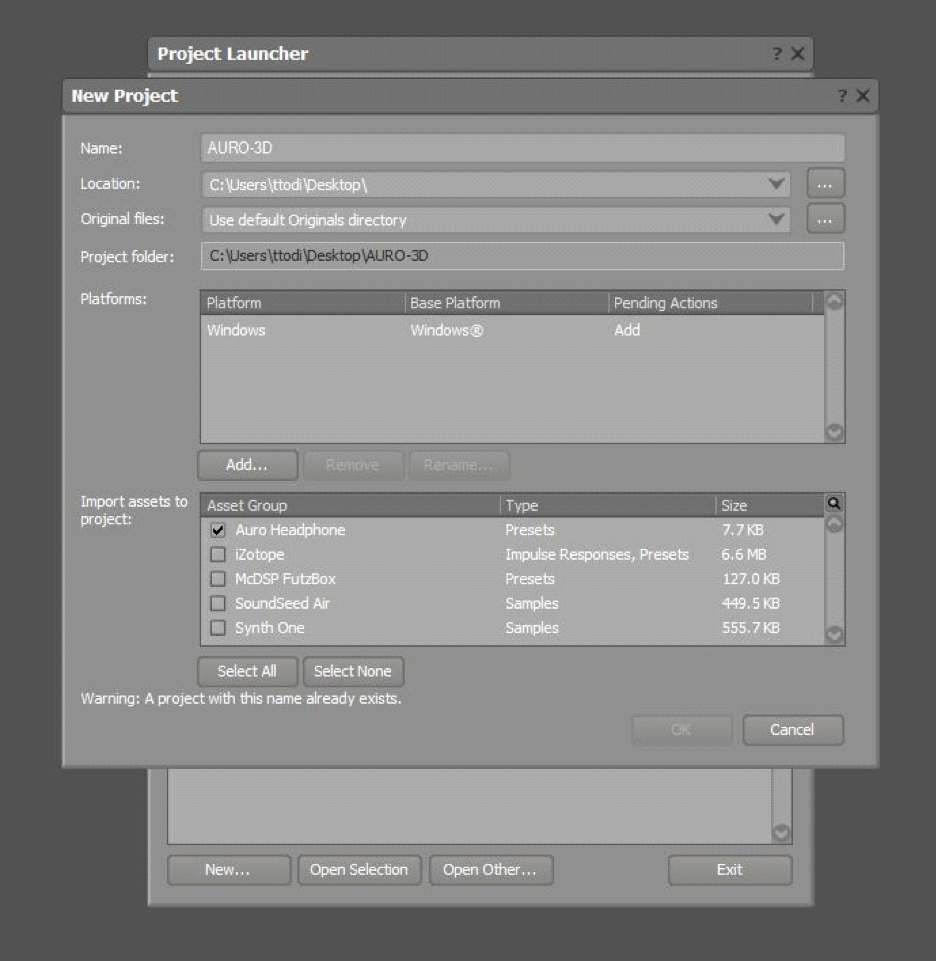
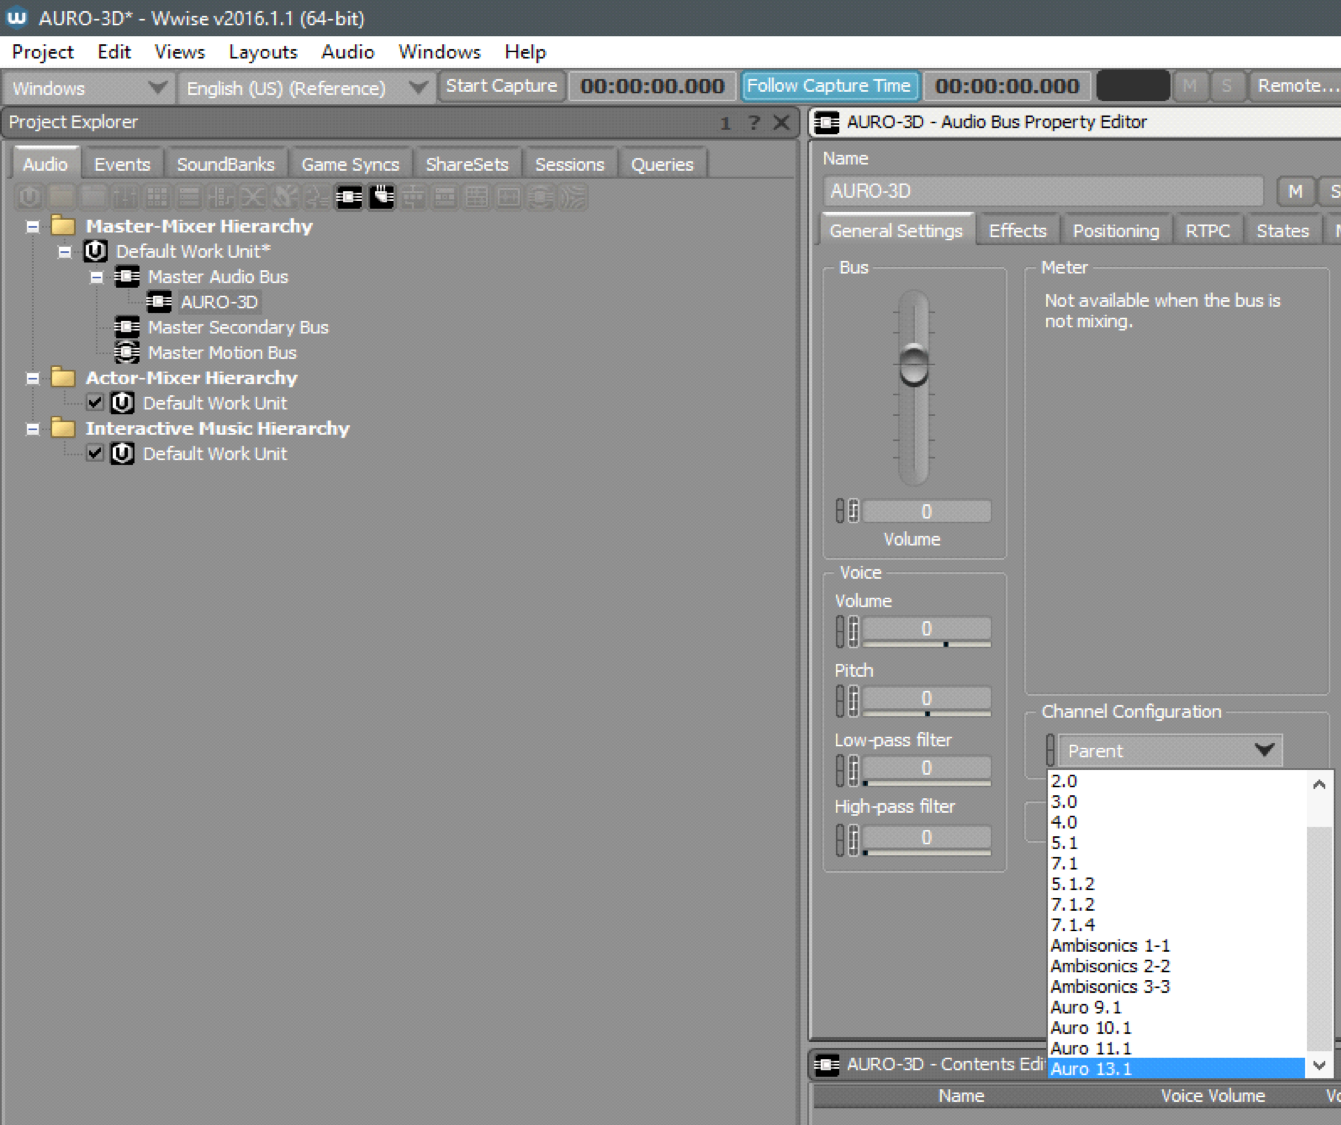
- Create a new Project and add the AURO Headphones presets.
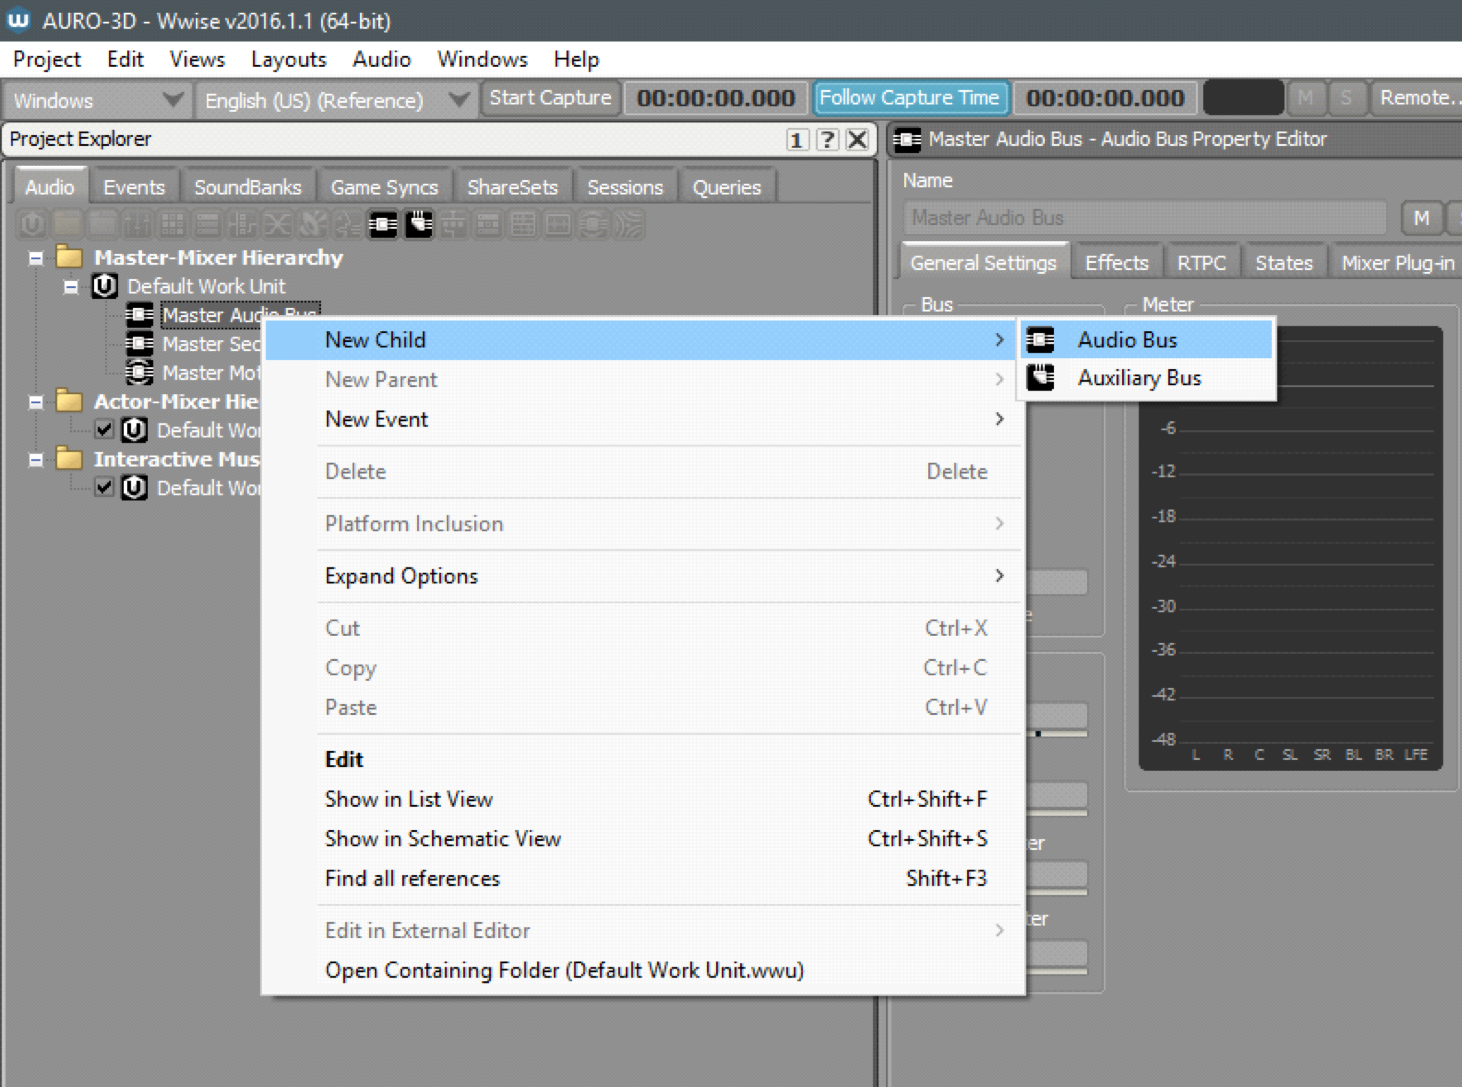
- Create a child Audio Bus under the Master Audio Bus.

- Select an AURO channel configuration in the General Settings tab of your new Audio Bus. The different configurations offer varied levels of detailed movement in the 360 field, and also demand a different amount of CPU as the speaker numbers increase. Spend some time analyzing and finding the best configuration for your title.

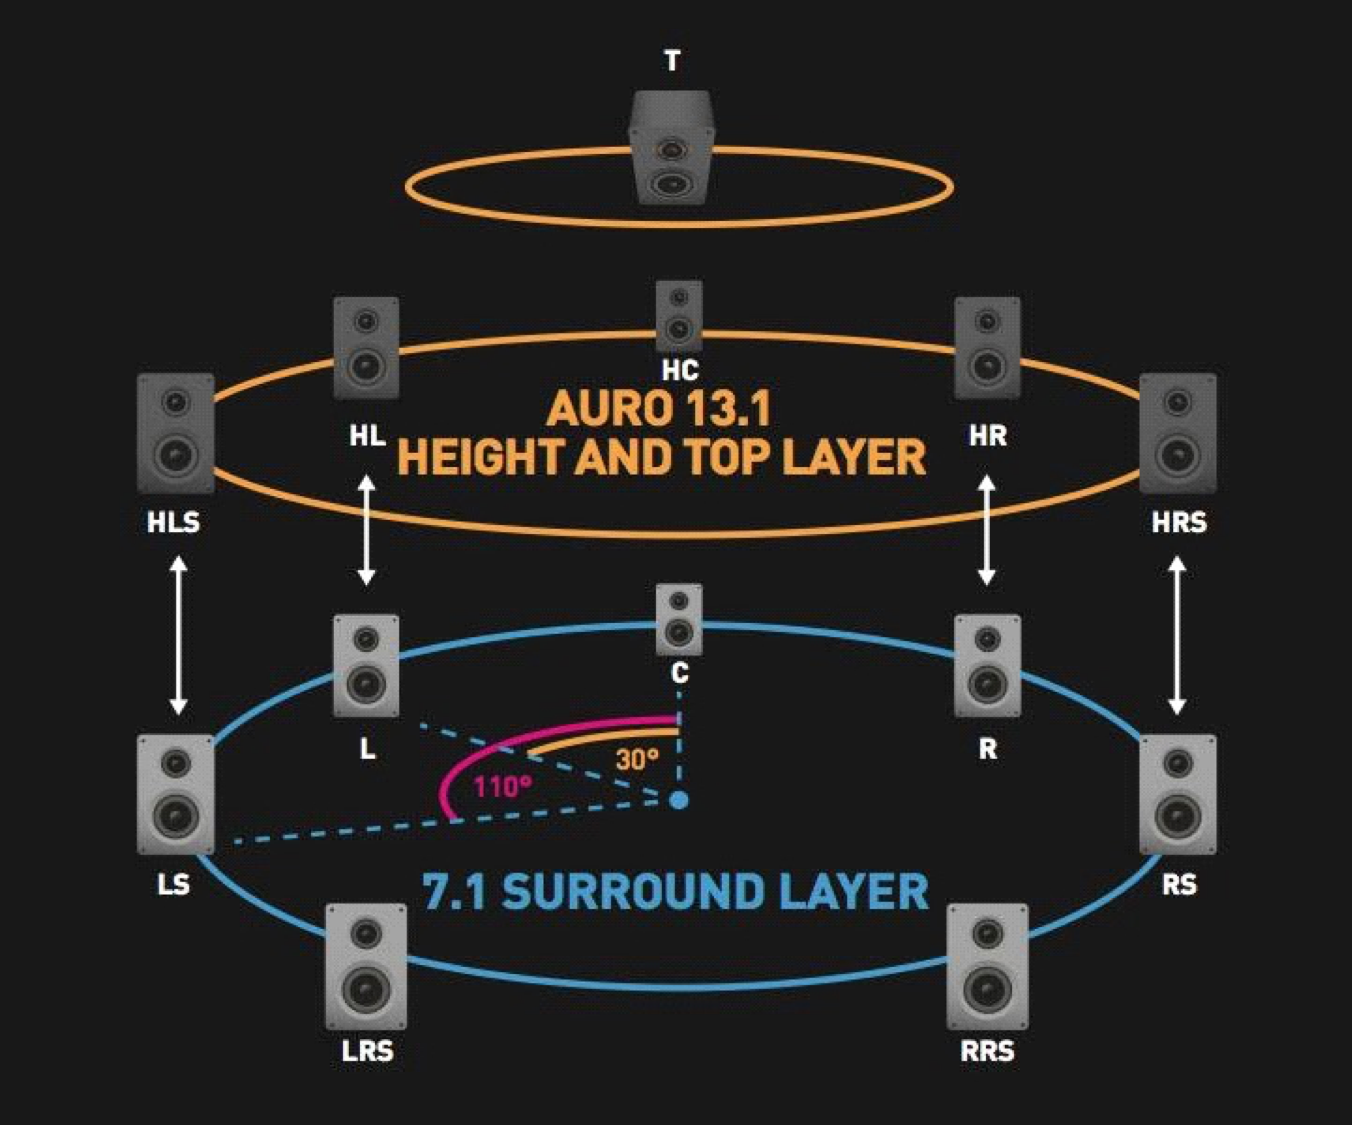
Here is a breakdown of the different AURO channel (speaker) configurations
- which is a 5.1 surround system with 4 Height speakers
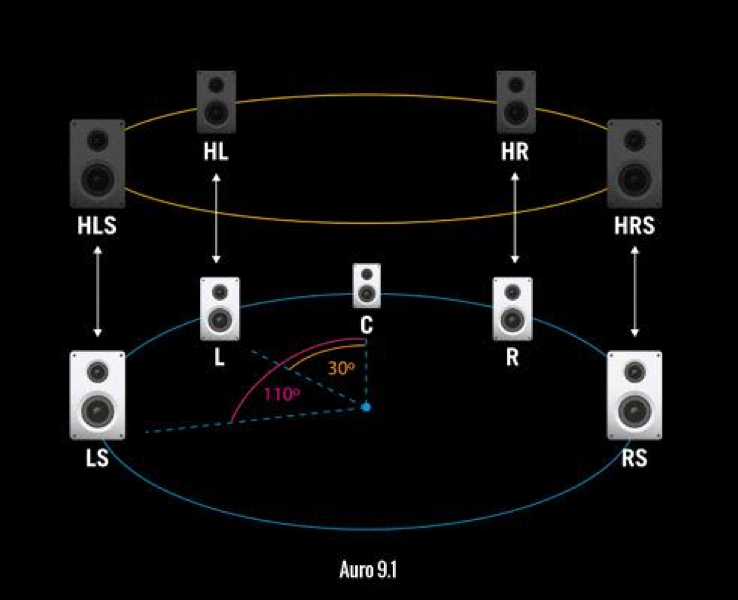
- which is a 5.1 surround system with 4 Height speakers and a Voice of God speaker
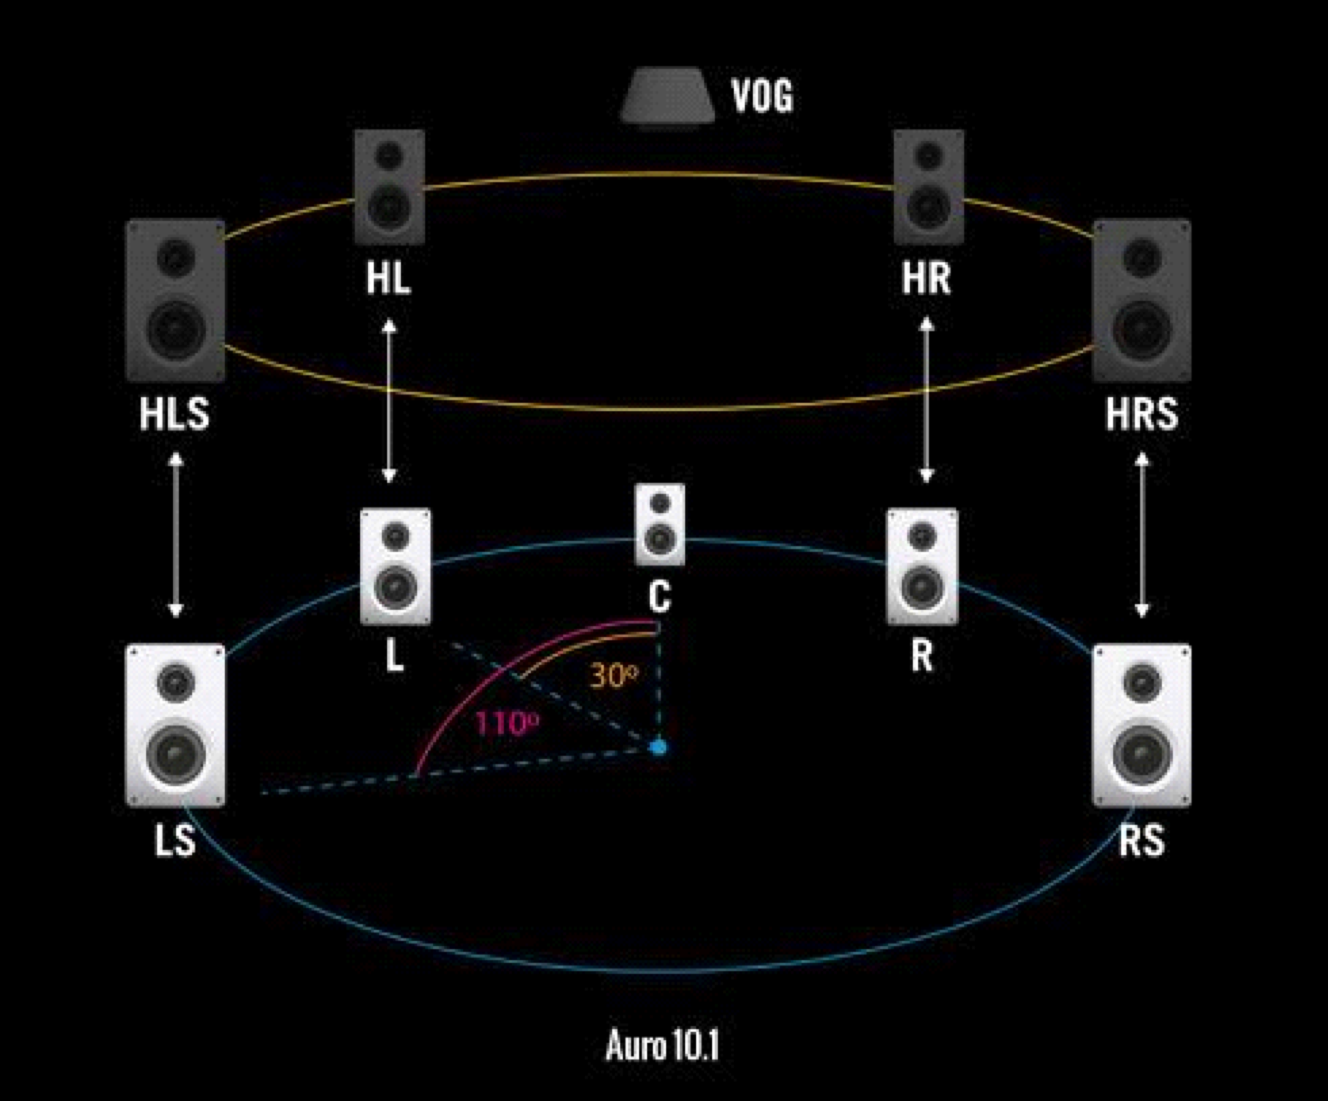
- which is a 5.1 surround system with 5 Height speakers and a Voice of God speaker
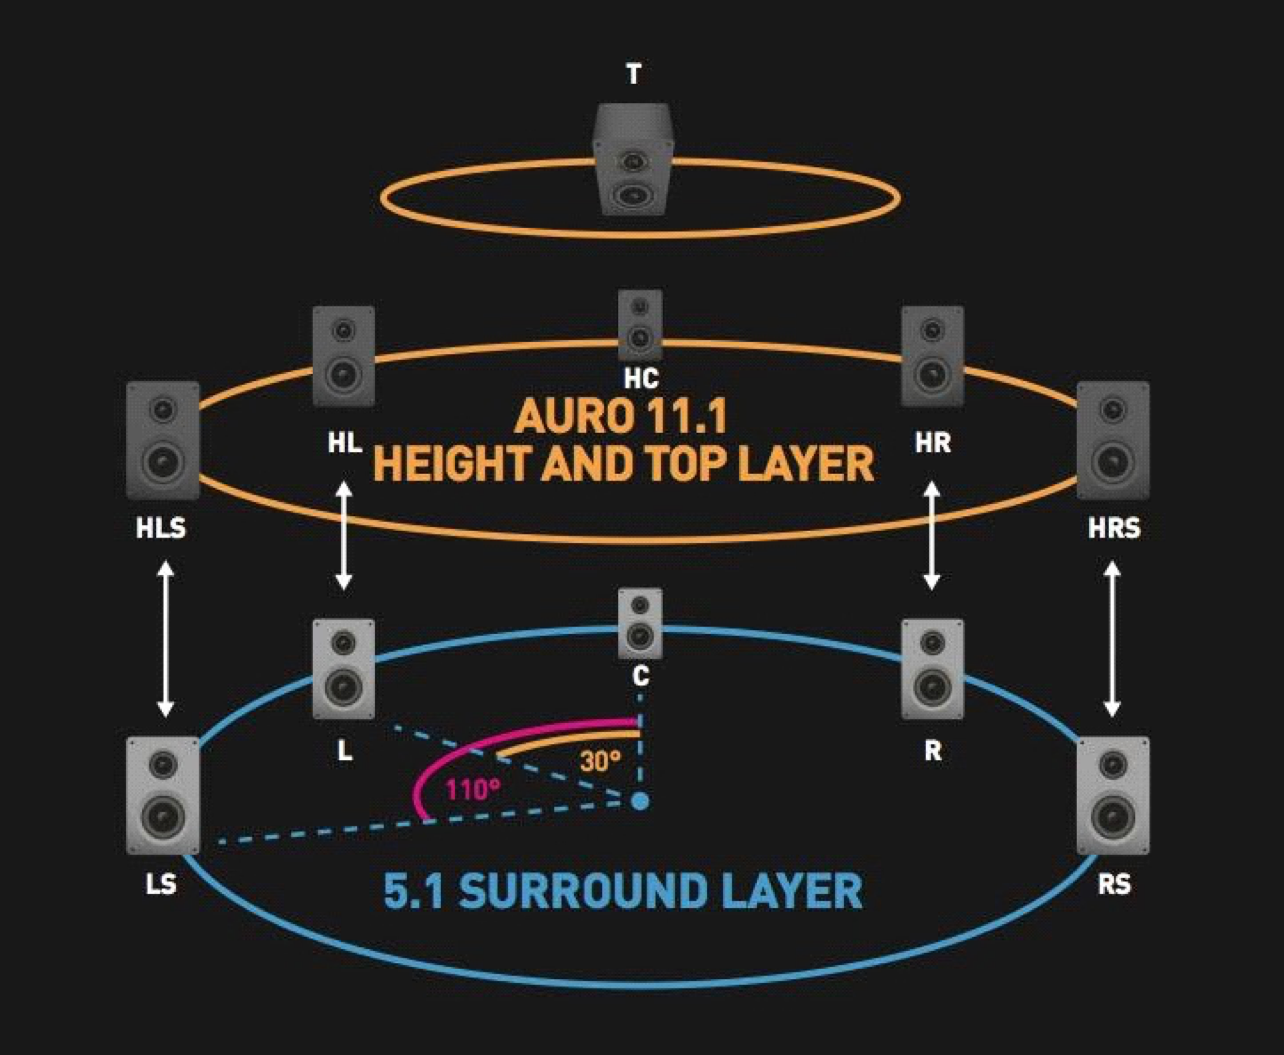
- which is a 7.1 surround system with 5 Height speakers and a Voice of God speaker
An important note here is that the AURO system in Wwise will work with the ambisonic format. You can create another audio bus in the same way that you did for the AURO Headphones step and select one of the ambisonic channel orders.
Ambisonic formats are really useful for Virtual Reality scenarios in that you can build assets that are already working in a static 360 degree field, as opposed to focusing your attention around mono files when it comes to ambiences. I have been recording and creating my own ambisonic files lately, and they can add a lot of depth to your design. If you are new to ambisonic files and concepts, then here is a great blog entry from Xavier Buffoni at Audiokinetic to help explain some of it.
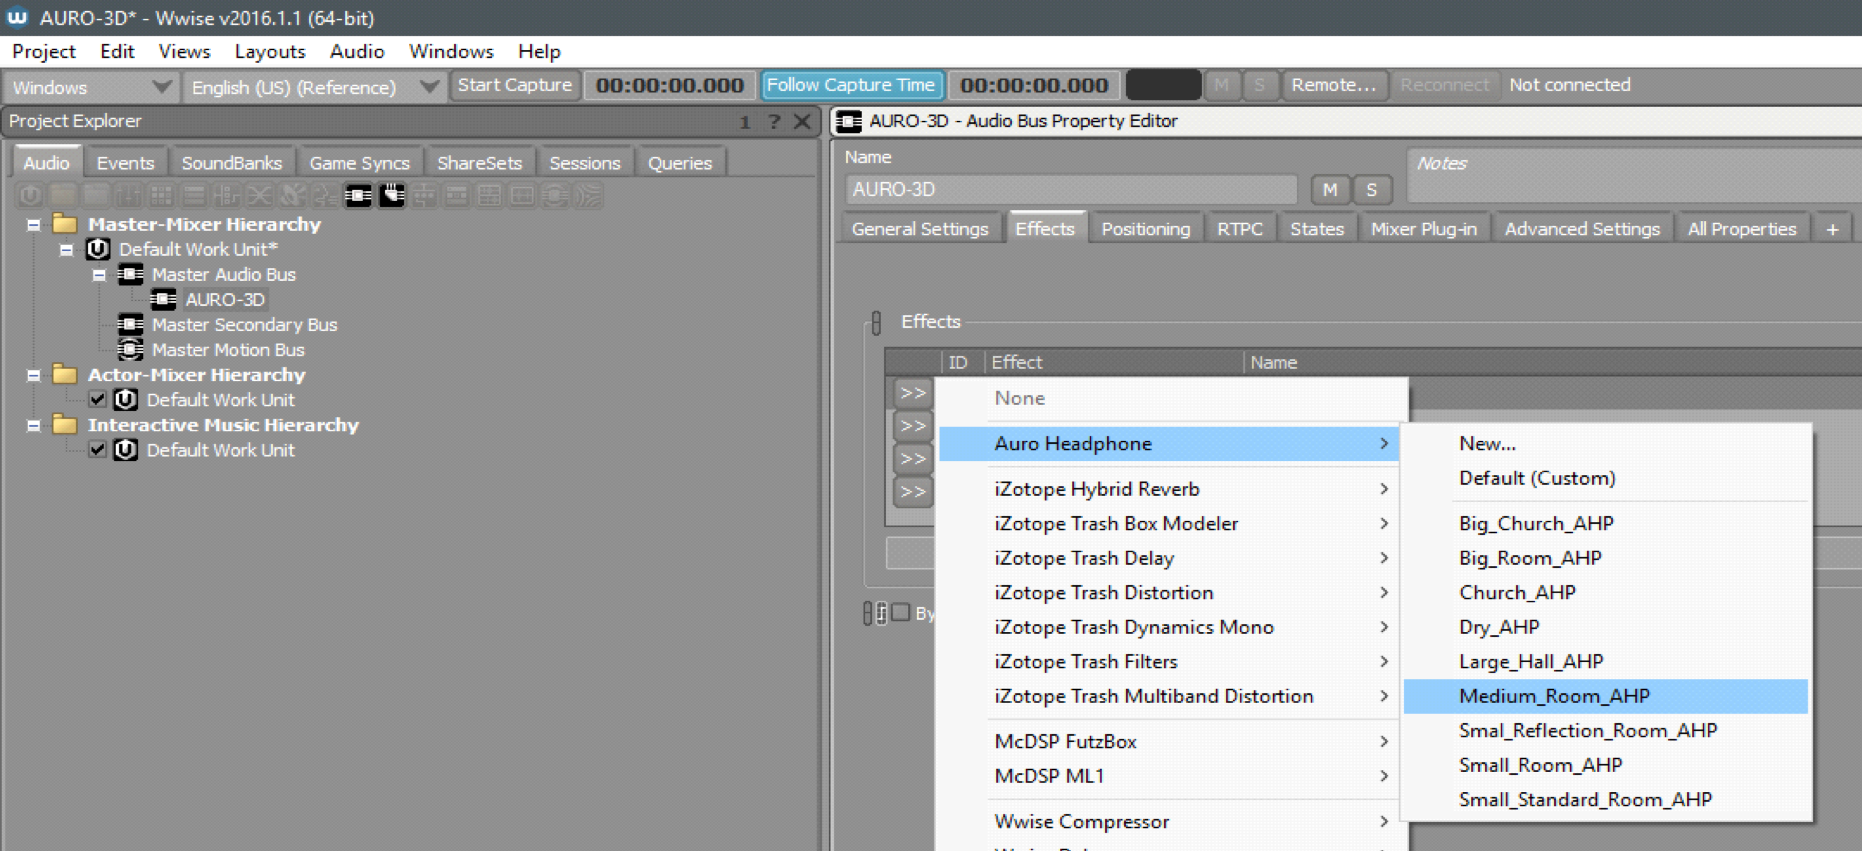
- Add the AURO Headphones plug-in to the Effects tab of your new Audio Bus.
- Assign your audio assets to the new AURO Audio Bus in the Output Bus section of the audio assets General Settings tab.
- Be sure to listen to your audio on headphones, so the Binaural output of the AURO Headphones plug-in will be heard.
Here are a few pointers on some of the main settings in the AURO Headphones.
- The Bypass button in the AURO Headphones is really useful for A/B comparisons of the binaural effect. The AURO Headphones plug-in will also cause a few level changes to the 2-channel mix by its design. You can use the plug-in's “Bypass Offset” to match the Headphones effect level with the bypassed signal. This will be the best way to have a neutral A/B comparison.
- Other than the Bypass Offset, I have found the default settings on the Level, ER Level, and LFE level to be best left as they are. Experiment with them, of course, but know that these settings are applied to the binaural effect and not the reverb of the Headphones plug-in.
- The Speaker Dist creates a distance between the speaker and the listener. I suggest allowing your real-time mix from Wwise to control that relationship. If you A/B test with the plug-in in Bypass, you can find a neutral relationship between what the plug-in is doing and what Wwise is doing before being processed through the binaural effect.
- Each of the settings found in the Room section of the plug-in deal with the size and dimensions of the binaural effect. The distance to the respective walls are set in meters which influence the delay-times for the early reflections. All 6 walls are positioned relative to the listener. To prevent unwanted room modal response, try to use unrelated and asymmetrical values for the walls' distances. The ranges for these settings are from 1 meter to 10 meters.
- The Reverb settings in AURO Headphones are less flexible than the different Wwise Reverbs you may be used to working with. I suggest bypassing the AURO Headphones Reverb at the top of the plug-in window and using the Wwise RoomVerb, Wwise Matrix Reverb, Wwise Convolution Reverb, or iZotope Hybrid Reverb for your mix. Also, be sure to put your Reverb in the signal chain before reaching the AURO Headphones. No effects should be placed after the Binaural process that the Headphones plug-in creates.
You now have a basic knowledge of the setup and function of the AURO Headphones and AURO Panner plug-ins within the context of a Wwise session. There is a lot more to learn about the production of sound within this setup. Future blogs in this series will talk about designing and implementing audio for VR, as well as diving into ambisonic recording and encoding for use with this AURO-3D.

Comments
Romain Loiseau
February 22, 2018 at 07:45 am
Very Interesting, but I just don't understand why my meters are not showing 10 channels when I'm using a auro 9.1 audiobus. Instead of L, R, C, LFE, HL, HR, HLS, HRS, I get L, R, C, SL, SR, BR, BL, LFE. Do you have an idea why ? thank you for this article,
Xavier Buffoni
April 04, 2018 at 10:58 am
I think you need to play content through this bus for the meter to adapt to the channel config.